Load Balancer Configuration
Enabling Configuration
Most configuration in Kubernetes is done in Kubernetes itself using Ingress specifications and helm. However, if you wish to access the Web Application Firewall (WAF) which is able to use ModSecurity rules, you will need to enable configuration.
Configuration, other than the high level configuration done in Kubernetes and helm is done using the WebAdmin Console. To enable it in helm, you will add the helm configuration parameter to your startup script:
--set service.ports.config=7090
7090 is the default external port; if you specify a different one to meet your security needs, you'll need to note it for the examples below.
All of the examples below assumed you have started the LiteSpeed Ingress Controller and enabled the configuration port.
Accessing Configuration
You access configuration from your browser using the IP address assigned by Kubernetes or the DNS name which is associated to it using the port 7090. For example:
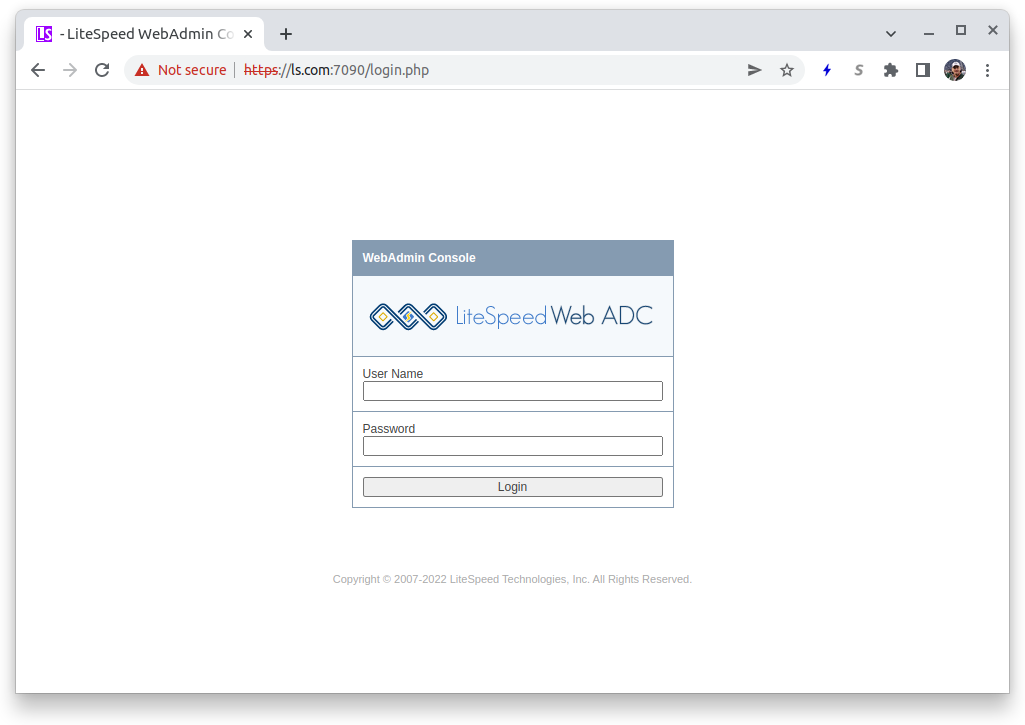
Initial login from the distribution uses the User name: Admin and the Password: 123456
Security Issue
The default user and password must certainly be changed immediately. Changes to configuration are automatically saved to Kubernetes ConfigMaps and normally you will not need to be concerned about them, as this makes the changes persistent.
Once you have logged in, to change the Admin password, select the WebAdmin Console icon, press the Security tab and you will see the admin user. Click on the user.
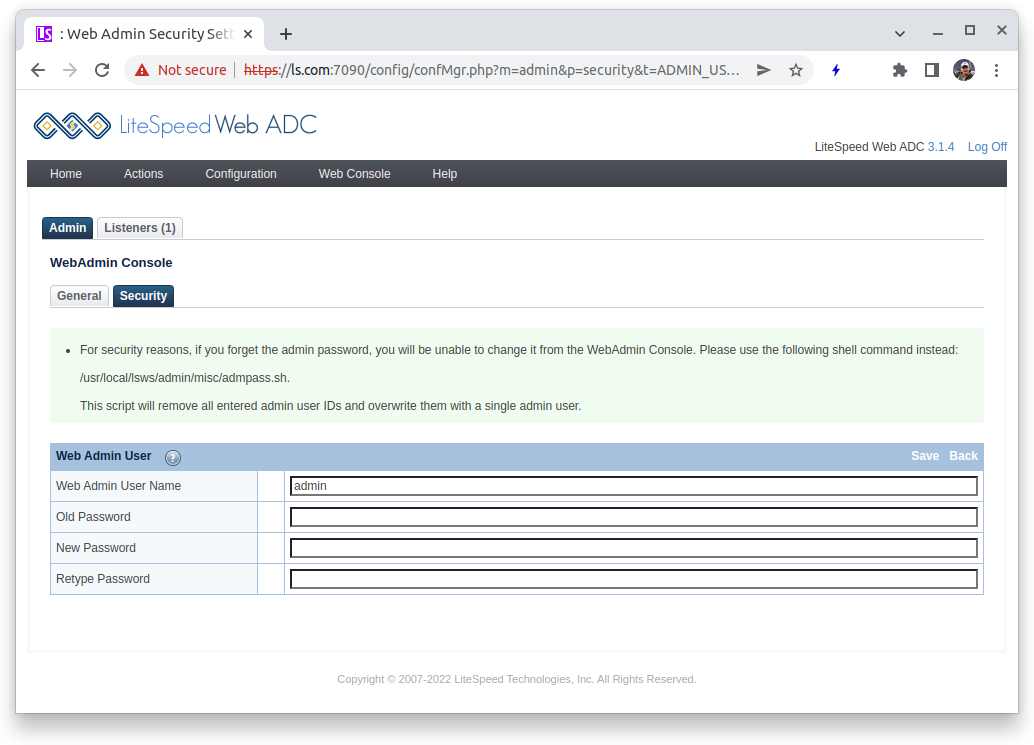
- Old Password : Enter
123456 - New Password : Enter a new password that meets the security requirements of your organization
- Retype Password: Enter the new password again
Press the Save link to save your configuration and return to the previous screen. The new password will be effective immediately.
Setting up the WAF
To enable the Web Application Firewall, you will need to:
- Copy rules to the load balancer.
- Create a template which can be used by an Ingress.
- Specify the template in your Ingress.
The primary documentation for the LiteSpeed WAF is Enabling ModSecurity Rules on Standalone LiteSpeed Web Server.
Copy Rules to the Load Balancer
Assuming you're using the Comodo rules, you would download the rules to a directory on your local machine with Kubernetes server access:
wget https://waf.comodo.com/api/cpanel_litespeed_vendor
unzip cpanel_litespeed_vendor
cd comodo_litespeed/
mv rules.conf.main rules.conf
cd ..
Rules must be copied to the /usr/local/lslb/conf/configmaps directory or below.
Tip
All files copied to /usr/local/lslb/conf/configmaps directory or below will be persisted between pod starts as ConfigMaps. Litespeed will also persist configuration and other files as ConfigMaps.
Assuming the LiteSpeed Ingress Controller is using pod ls-k8s-webadc-7dcbcb7569-dpk8t, specify:
kubectl cp comodo_litespeed "ls-k8s-webadc-7dcbcb7569-dpk8t:usr/local/lslb/conf/configmaps"
Creating a Template
A template is used to make the rules available to LiteSpeed. You create a template in the configuration by pulling down the Configuration menu and selecting Virtual Host Templates. On the right side of the Virtual Host Template List press the Add button to create a new template:
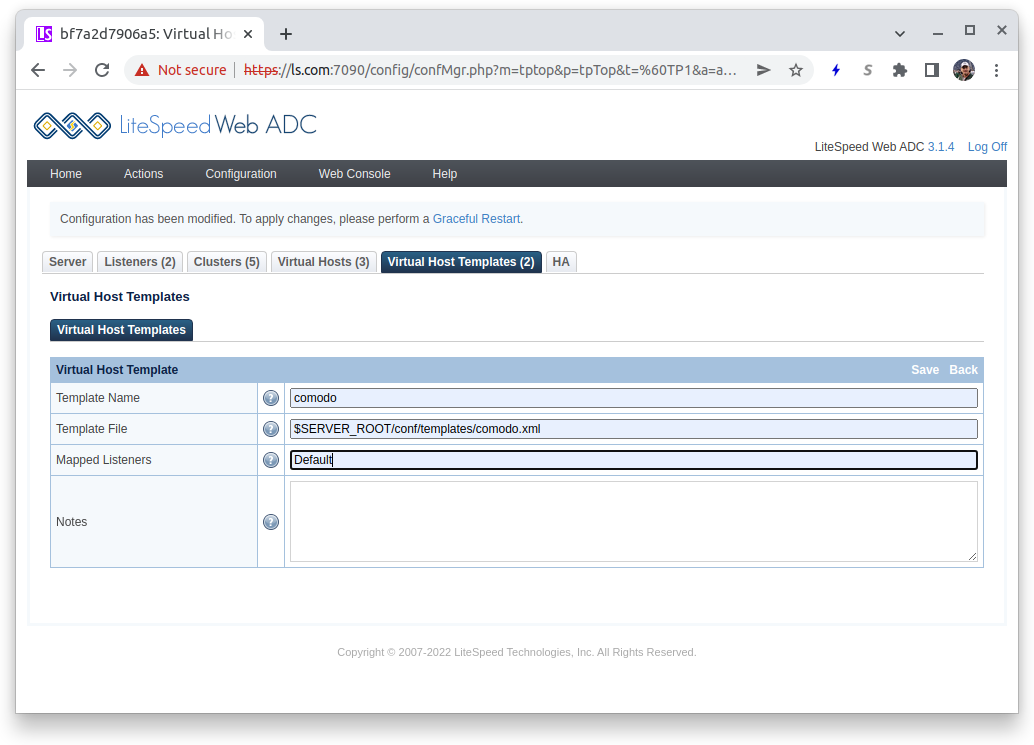
For this example:
- Template Name: Enter
comodo - Template File: Enter
$SERVER_ROOT/conf/templates/comodo.xml - Mapped Listeners: Enter
Defaultwhich is an existing listener and is required.
Press the Save button in the Virtual Host Template titlebar. It will say Input error detected, but in the Template File box you will see:
*file /usr/local/lslb/conf/templates/comodo.xml does not exist. CLICK TO CREATE
Click on the CLICK TO CREATE label and then press the Save button again to return to Virtual Host Templates.
Edit the Template
In the Virtual Host Templates list, click on the comodo entry to enter the template editor. The first tab displayed is the Template tab and you need to edit this. In the ZeroConf table, press the Edit button in the header bar:
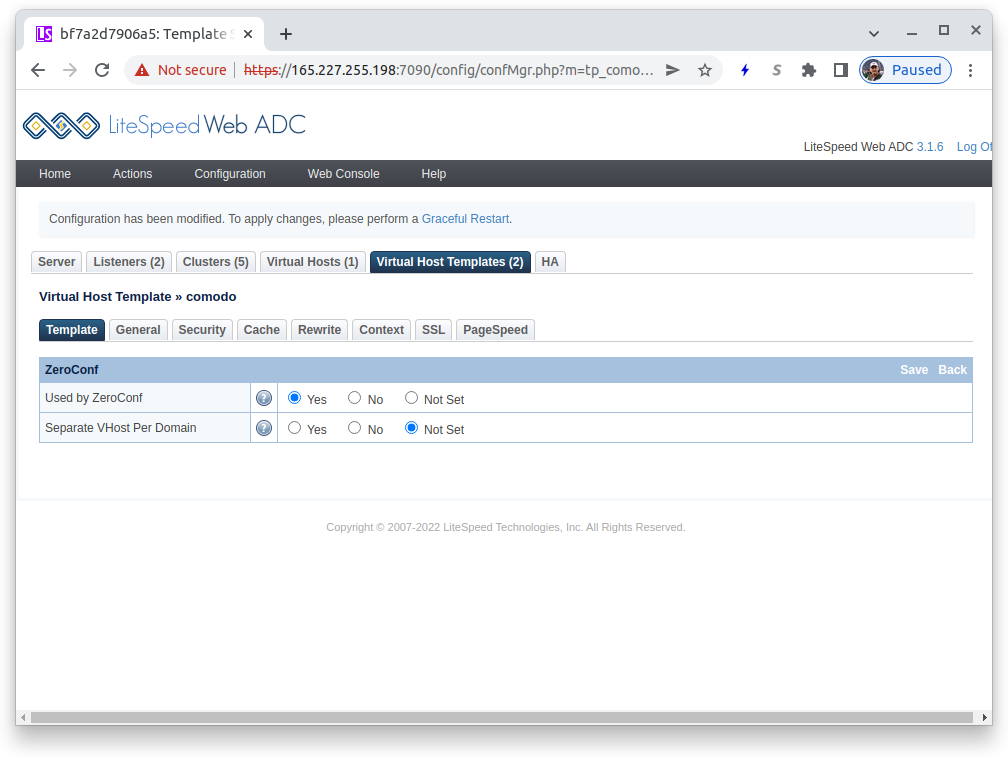
- Used by ZeroConf: Press the
Yesradiobutton
Press the Save button in the ZeroConf titlebar to return.
General Configuration
Press the tab General in the Virtual Host Template table. In the Template Settings table press the Edit button.
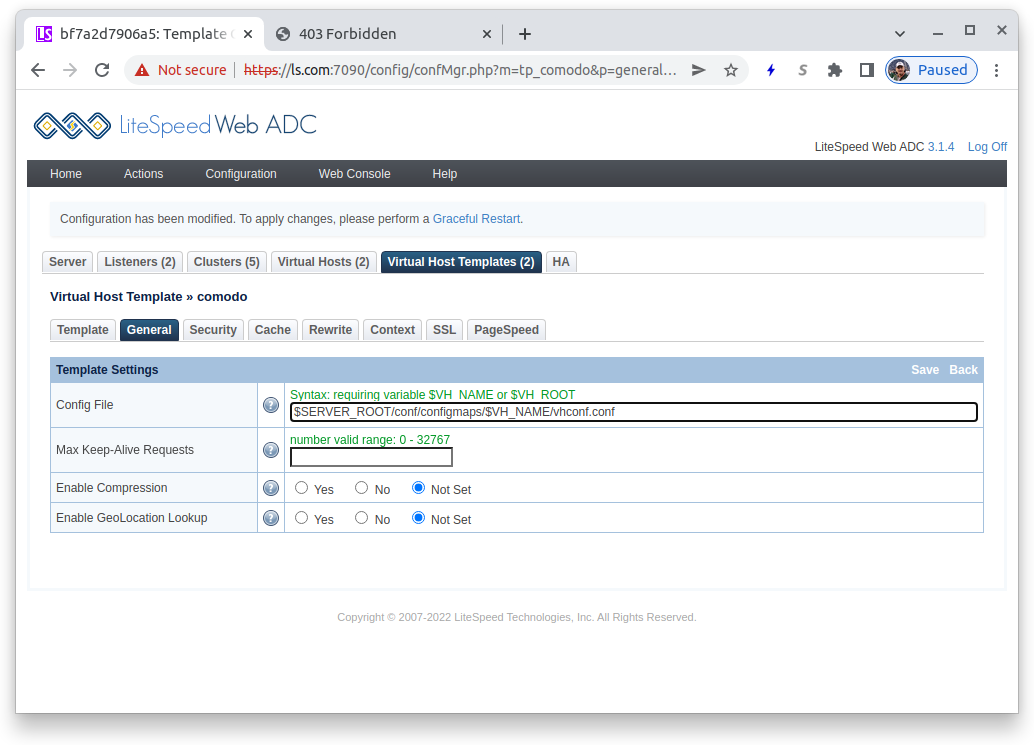
You only need to enter a single value here:
- Config File:
$SERVER_ROOT/conf/configmaps/$VH_NAME/vhconf.confThe file name must have the symbolic $VH_NAME (to guarantee uniqueness) and must be in the $SERVER_ROOT/conf/configmaps directory to be properly serialized and persist between POD restarts.
Press the Save button in the Template Settings titlebar to save your definition.
Security Configuration
Press the tab Security in the Virtual Host Template table. This is where you enable the important security settings for your template.
To enable the WAF, in the Web Application Firewall WAF) table press the Edit button in the titlebar:
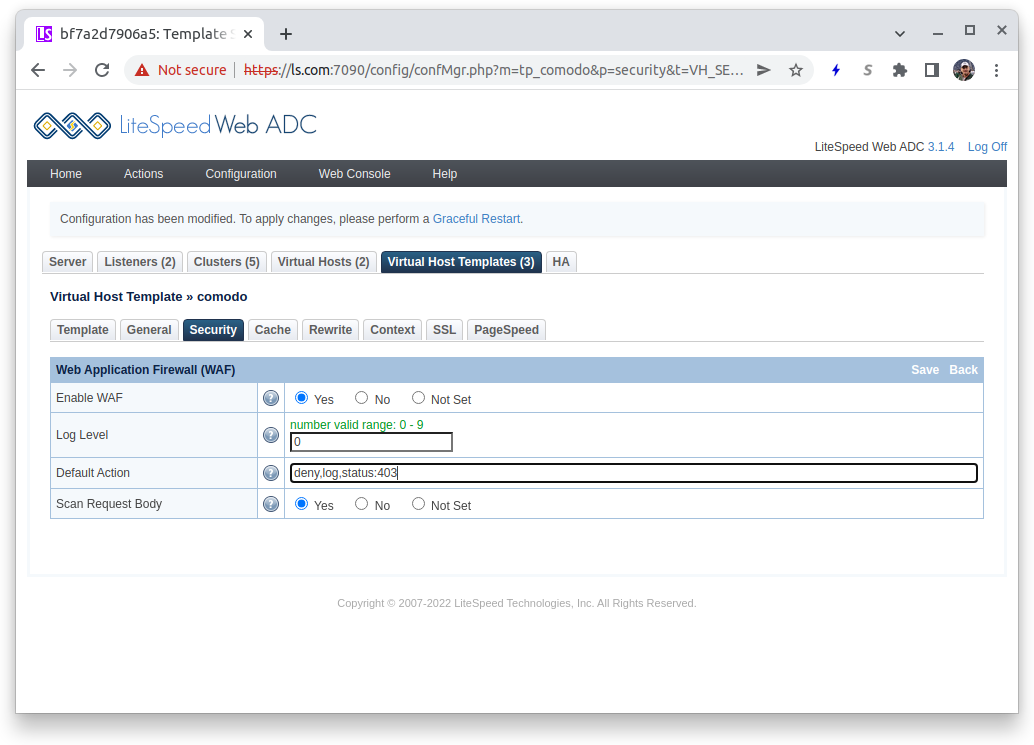
- Enable WAF:
Yes - Log Level: Enter
0to disable logging. You may want to start with a high number like9when debugging problems, but with big rule sets, like Comodo, it results in excess logging. - Default Action: Written following mod_security guidelines, a reasonable value is
deny,log,status:403which will result in a failed attempt to be denied, a message logged (if logging is enabled) and a403 Forbiddenreturn code. - Scan Request Body: Only affecting POST requests, best protection is provided by selecting
Yes, at the cost of some performance loss.
Press the Save button in the Web Application Firewall titlebar to return.
To specify your rules, in the WAF Rule Set titlebar press the Add button.
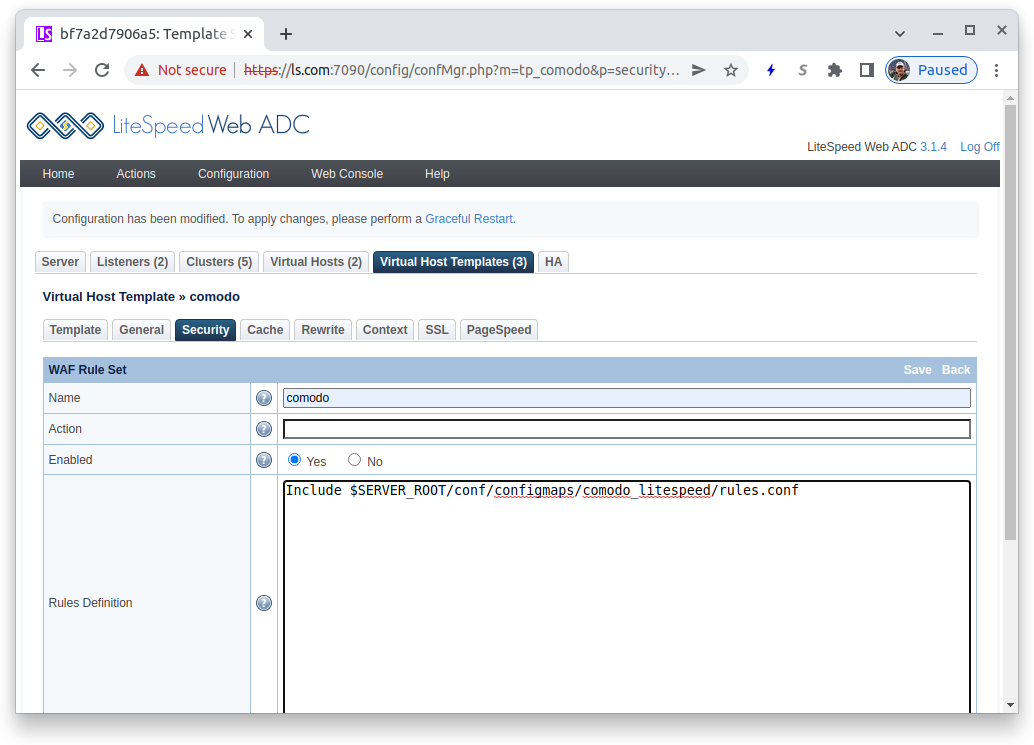
- Name:
comodo - Enabled:
Yes - Rules Definition:
Include $SERVER_ROOT/conf/configmaps/comodo_litespeed/rules.confto use the rules you copied above
Press the Save button in the WAF Rule Set titlebar to return.
Graceful Restart
This completes the required configuration for a template using the Comodo ruleset in the LiteSpeed Configuration. To activate it, press the Graceful Restart highlight just above the tabs. This will return you to the WebADC control panel.
Using Your Template in an Ingress
In the example above, you created a template named comodo. You use it by entering an Annotation in your Ingress definition. To use the LiteSpeed Ingress Controller you must already have the annotation in your Ingress definition of:
kubernetes.io/ingress.class: litespeedtech.com/lslbd
Now add just after it, the annotation litespeed.ingress.kubernetes.io/template:
litespeed.ingress.kubernetes.io/template : comodo
This is a simple sample Ingress definition:
    apiVersion: networking.k8s.io/v1
    kind: Ingress
    metadata:
      name: modsec-foo
      annotations:
        kubernetes.io/ingress.class: litespeedtech.com/lslbd
        litespeed.ingress.kubernetes.io/template : comodo
    spec:
      tls:
        - hosts:
            - foo.bar.com
          secretName: conformance-tls
      rules:
        - host: "modsec-foo"
          http:
            paths:
              - path: /foo
                pathType: Prefix
                backend:
                  service:
                    name: modsec-foo
                    port:
                      number: 8080
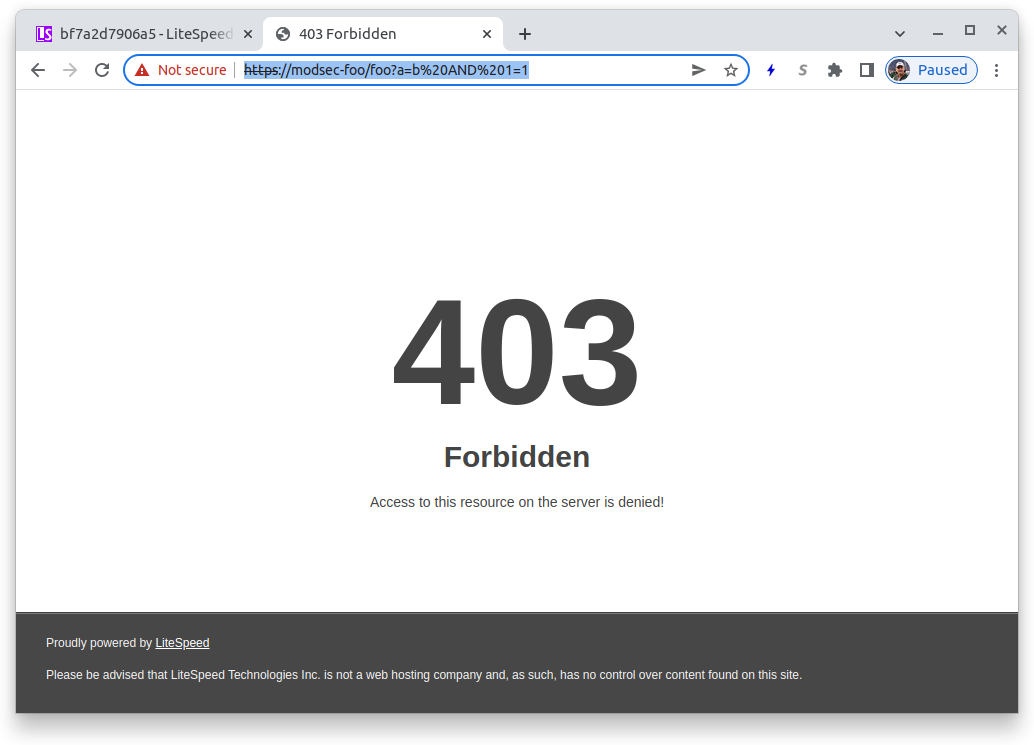
Once you have activated your Ingress you can test it. With most rules, including the Comodo rules, the following specification will result in a 403 return code:
https://$server_domain/?a=b AND 1=1
Using the example Ingress above:
https://modsec-foo/foo?a=b AND 1=1