ZeroConf Clusters
LiteSpeed Web ADC's ZeroConf integration allows you to simply and easily build clusters.
Setup/Configuration
ADC ZeroConf Setup
Listeners
- In the Web Admin, navigate to ADC WebAdmin Console > Configuration > Listeners
- For each listener that you want ZeroConf enabled on, set the listener config's Enable ZeroConf to
Yes
ADC Password Setup
- Determine where to place the
.htpasswdfile.
Note
This file must be in a directory readable by the user running the ADC worker (default nobody).
- Run the following command to generate
.htpasswdfile from console
$ sudo htpasswd -c /HTPASSWD_PATH/.htpasswd zero
- Then enter password (e.g.
zero) two times - If the command
htpasswdis not found, please run the following command to install it:
$ sudo yum -y install httpd-tools
$ sudo apt install apache2-utils
- The
zeroafter.htpasswdis the account name. You can change to whatever you want. - The ZeroConf password file accepts one account only
- An
.htgroupmay be created if desired, but is not required.
Tip
Save the user and plaintext password somewhere handy. They will be needed later.
ZeroConf Setup
In the LSADC Web Admin, navigate to ADC WebAdmin Console > Configuration > Server > ZeroConf
General section
- Set Enable Zero Config to
Yes - Set User Password File to
/HTPASSWD_PATH/.htpasswd - OPTIONAL: Set Group Password File to
/HTGROUP_PATH/.htgroup - Set ZeroConf SHM Directory to
$SERVER_ROOT/zconf
ZeroConf Listeners Section
- Click Add button
- Set Listener Name, e.g.
ZeroConf - Set Address, The address should be the ADC's IP address and a port of your choice, e.g.
10.10.40.150:55688 - Setup Certificate with file PATH
- Private Key File, e.g.
$SERVER_ROOT/crm.key - Certificate File, e.g.
$SERVER_ROOT/crm.pem
- Private Key File, e.g.
Tip
Save the Address somewhere handy. It will be needed later.
Optional Settings
ZeroConf Log
- Set File Name to
$SERVER_ROOT/Zconf.log - Set Log Level to
DEBUG - Set Debug Level to
HIGH - Set Rolling Size (bytes) to
10M
ZeroConf Access Log
- Set File Name to
$SERVER_ROOT/Zconf-Access.log - Set Rolling Size (bytes) to
10M
VHost Templates
In general, VHost Templates provide a method to generate many VHosts that differ only by domain and cluster.
Introduced in version 0.5, ZeroConf can use ADC-configured VHost Templates.
ZeroConf uses VHost Templates slightly differently than a Template's Member VHost.
A Member VHost will inherit from the Template VHost, all else is inherited from the Global VHost/Server level configurations.
ZeroConf will inherit from the Template VHost. If a value is not set in the template vhost, Server-level inheritance is not guaranteed. Therefore, it is recommended to configure as much of the values as possible in the event that a configuration did not inherit the server-level value.
For ZeroConf, only a VHost Template needs to be configured. The 'members' are generated when the domain is requested for the first time. ZeroConf is not context aware. It does not know the similarities between example.com and blog.example.com.
ADC Configurations
In addition to the general template configurations, the following options are available:
In Server > ZeroConf: Separate VHost Per Domain
And in Virtual Host Templates > Template > ZeroConf: Used By ZeroConf and Separate VHost Per Domain
Used By ZeroConf: Toggles whether to allow ZeroConf to use the template. Defaults to yes.
Separate VHost Per Domain: By default, domains that share backend combinations will also share VHosts and cache stores. Enabling separate VHost per domain creates individual VHosts and cache stores. This setting is not inherited by other templates. Defaults to no.
Note
Even when using this setting, ZeroConf is still not context aware. sub.example.com is considered a different domain than example.com.
Template Selection
By default, no templates are selected. Therefore, the server level settings are used to create the VHosts.
You can select a template using the "template" configuration option in the ZCUP message, as detailed in the API.
cPanel ZeroConf Setup
cPanel ZeroConf Plugin Install
- Download plugin file from the ADC Downloads Page
- Run the following command to install the plugin:
$ sudo mkdir /opt/whm_lsadc_zconf
$ sudo unzip whm_lsadc_zconf-*.zip -d /opt/whm_lsadc_zconf
$ sudo cd /opt/whm_lsadc_zconf
$ sudo ./install.sh
- Login to WHM and search zconf
ZeroConf Password Setup
- Determine where to place the
.zconfpasswdfile. This file must be in a directory readable by the user running cPanel. - Run the following command to generate the
.zconfpasswdfile from console:
$ sudo echo 'zero:zero' > /PATH_YOU_WANT/.zconfpasswd
Tip
This is where you use the user and password you saved earlier.
cPanel ZeroConf Setup
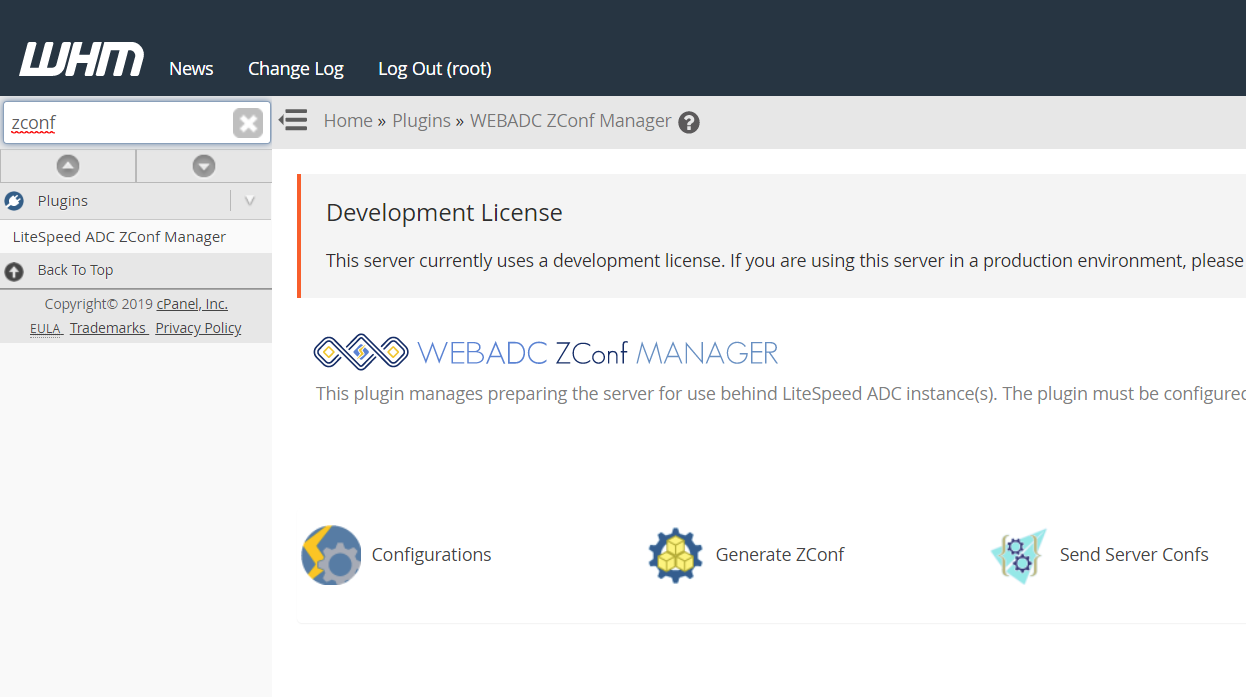
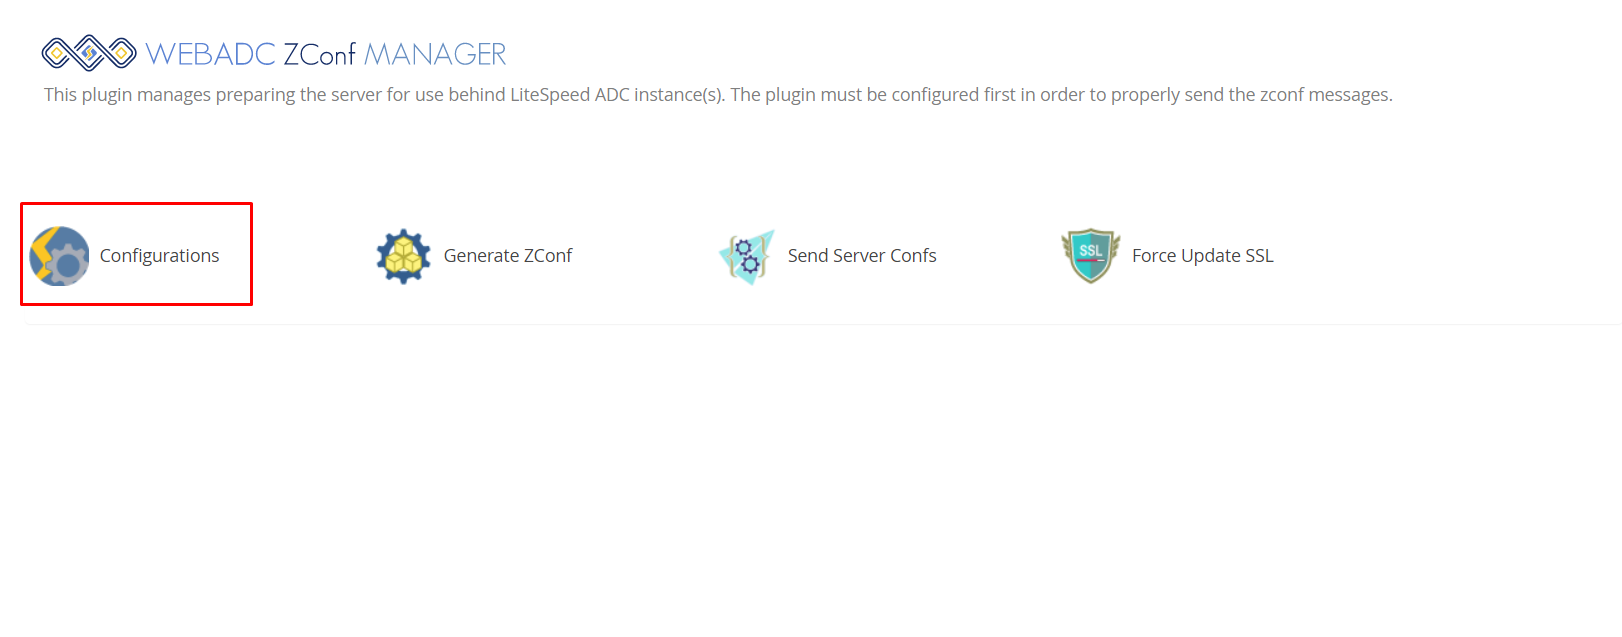
- In WHM, navigate to WHM > LSADC ZeroConf Manager from the Plugins section
- Click Configurations
- Set up Server Conf Name, e.g.
cpanel-153 - Set up ADC Basic Auth, e.g.
/PATH_YOU_WANT/.zconfpasswd - Set up ADC List, e.g.
10.10.40.150:55688
Tip
This is where you use the Address field you saved.
- Set up Exclude Users(optional), e.g.
testaccount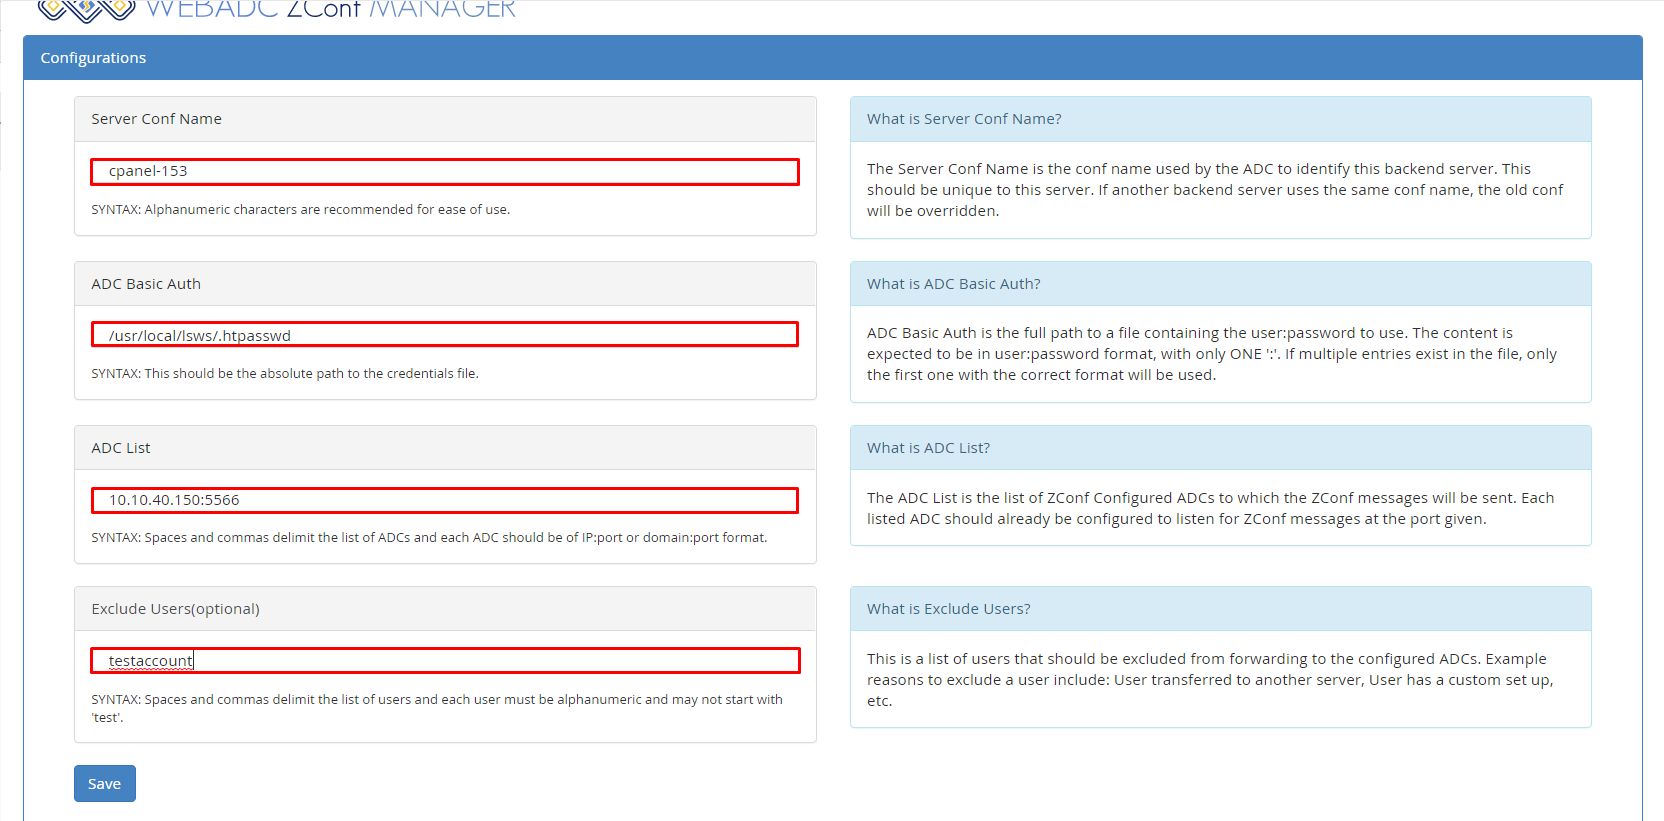
- After configuring the settings, we can navigate back to the upper level by clicking the back to LSADC ZeroConf Manager button
Tip
The Server Conf Name is the conf name used by the ADC to identify this backend server. This should be unique to this server. If another backend server uses the same conf name, the old conf will be overridden.
Templates
In order to properly utilize all ADC features, you may need to create a template with ZeroConf and instruct the WHM plugin to use it.
Global
A global template is used by all cPanel domains. If you have created a template in the LSADC WebAdmin Console, you can configure it as a global template with ZeroConf.
Let's say you've created a template and named it whm_adc. To use it as a global template, create a /etc/apache2/conf.d/userdata/web_adc.conf file. Add the following content to the file:
<IfModule zconf_module>
zctemplate whm_adc
</IfModule>
Per Site
You can also make a more customized template for particular domains.
Let's set up the site-level whm_adc_for_example template (which you have already created in the ADC's WebAdmin Console) for the example.com domain, owned by user example. Create these two files:
/etc/apache2/conf.d/userdata/ssl/2_4/example/example.com/web_adc.conf
/etc/apache2/conf.d/userdata/std/2_4/example/example.com/web_adc.conf
Insert the following content in each file:
<IfModule zconf_module>
zctemplate whm_adc_for_example
</IfModule>
Rebuild
For both kinds of templates. you will need to rebuild the Apache configuration. Use the following commands:
/scripts/rebuildhttpdconf
systemctl restart lsws
Then, follow the instructions below to Manually Send Server Confs.
Manually Send Server Confs
The first time we set up ZeroConf, we may want to try it manually to see if it works as we expect.
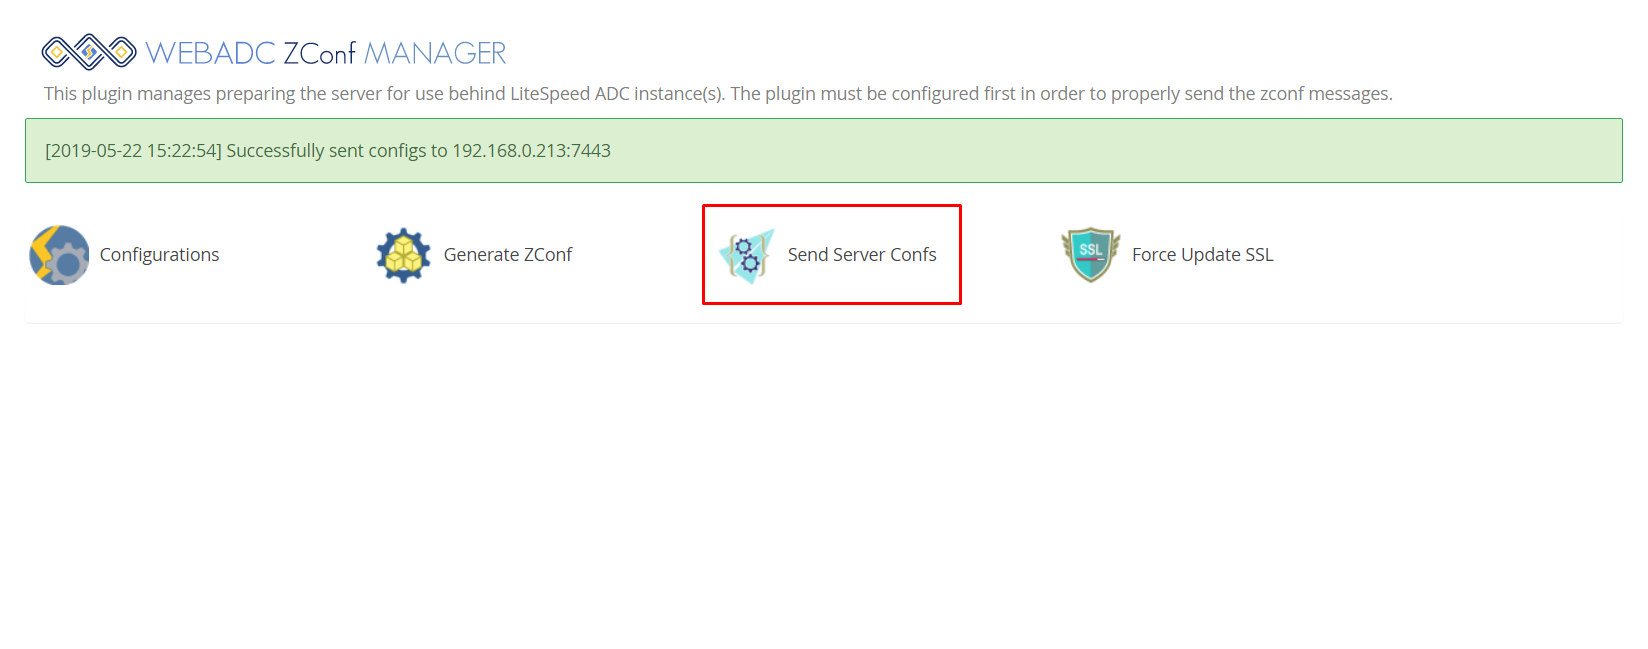
- In the WHM LSADC ZeroConf Manager Configurations page click Generate ZeroConf to generate ZeroConf Message Files

- Click Send Server Confs to send the config files to the ADC
Firewall Configuration
If you set up ZeroConf to listen on port 55688, then you need to confirm the firewall allows TCP 55688 on both ADC and Web Server (cPanel).
For example, CentOS 7 firewall setup port 55688:
firewall-cmd --zone=public --permanent --add-port=55688/tcp
firewall-cmd --reload
How to verify ZeroConf is working
Experimental Environment
These are example values used during our internal test. For this section, these should be replaced by your own IP and site entries.
- ADC IP:
10.10.40.150 - WHM IP:
10.10.40.153 - DNS entry:
10.10.40.150<->c7-20.ls.com
Verification step
- In WHM, Create a New Account. For us, the domain is
c7-20.ls.com - Set up a WordPress site. For us, the URL is:
http://c7-20.ls.com/wordpress/
Note
Automatic sync takes 5 minutes to complete. (e.g. after creating an account [Domain] on cPanel, then you will see it sync to the ADC in 5 minutes.) It takes 5 minutes because the process pauses, giving the Apache configurations time to completely update before the changes are pushed. (We have found that the PkgAcct::Restore account action took the longest time to update.)
- In a browser, visit
http://c7-20.ls.com/wordpress/. - Using the browser's Developer Tools, check the response headers. The remote IP should be the ADC's IP. In our case, it is
10.10.40.150.
If everything was set up correctly, the site is now serving through the ADC using ZeroConf.
What if I Have Multiple Servers?
Multiple-ADC
If you have multiple Web ADCs, in the WHM LSADC ZeroConf Manager Configurations, add all the ADC IPs into the ADC List configuration.
Multi-cPanel
If you have multiple WHM Servers, simply follow cPanel ZeroConf setup with a different Server Conf Name.
Troubleshooting
To assist with troubleshooting, these are the logs generated by the ZeroConf system:
- In the Terminal on the WHM Server, the ZeroConf plugin error log may contain some information. Default path:
/usr/local/cpanel/3rdparty/lsadc_zconf/error_log - In the Terminal on the ADC, the error log may contain some information. Default path:
/usr/local/lslb/logs/error.log - In the ADC Web Admin, enable the Log Settings. ZeroConf specific logs will output there.
Send the logs to us when you need help with an unknown ZeroConf issue. They will help us track down why and how the issues presented themselves.
Required configurations are not set.
This error means you attempted to send configurations from a backend without having configured the plugin to target an ADC.
Check to make sure that the Plugin Settings are set and correct.
Server conf files not generated yet.
This error means you attempted to send configurations from a backend without having generated any ZeroConf configuration messages.
Try to generate and send server configurations manually. If you get the same error message after re-generating, there is a problem with how the configurations are generated. Submit a ticket to LiteSpeed Tech with the ZeroConf plugin error log.
Failed to send command ZCUP to ADC_IP:PORT
Error: This could be because the ADC is not configured to listen on that port. This could also be an issue related to iptables configurations on the server. To test please make sure that a basic curl command from the server to the ADC works. If the curl test returns that it couldn't connect to host, there is an issue.
Most likely, the ADC ZeroConf Listener is not set up correctly. Review your listener configurations and make sure that the firewall is not blocking the port.
Error: auth parameters did not work.
The password file did not match the password set in the ADC configurations. Review your ADC Passwd set up as well as your WHM Password Setup to make sure that they are properly configured. The file contents are important to match.
As well, make sure that the firewall is accessable by the relevant application (the lsadc binary should have access to its passwd file, WHM should have read access to its file).
Sending command ZCSSL to ADC_IP:PORT resulted in error 400
The password file did not match the password set in the ADC configurations. Review your ADC Passwd set up as well as your WHM Password Setup to make sure that they are properly configured. The file contents are important to match.
Sending command ZCUP to ADC_IP:PORT resulted in error 403
The configuration up message got an Access Denied message from the ADC. Review your ADC Passwd set up as well as your WHM Password Setup to make sure that they are properly configured. The file contents are important to match.