Cloudflare issues
Cloudflare users may receive 522 connection errors, and may be seeing Cloudflare proxy IPs in LiteSpeed Web Server logs instead of the real visitor IP. Here's how to address both issues.
522 connection error
If you have Cloudflare enabled and are receiving 522 connection errors, then it is possible that LiteSpeed Web Server's (LSWS) Anti-DDoS settings are causing these connections to be blocked. To get around this, you can whitelist Cloudflare's IPs/subnets by adding them to LSWS's Allowed List.
Note
As of LSWS v5.4.9, Cloudflare IPs are automatically whitelisted. You only need to whitelist Cloudflare manually as shown below, if you are using an earlier version of LSWS.
For your reference, Cloudflare IP Ranges are listed here.
From the WebAdmin Console, navigate to Configuration > Server and click on the Security tab.
Scroll to the bottom of the page. You will see the Access Control section which contains the Allowed List and Denied List. Click Edit at the top right of this section.
By default, the Allowed List will contain ALL. In most cases, this allows all IPs/subnets to connect to the server. Since the Cloudflare-enabled IPs/subnets are being blocked by LSWS's Anti-DDoS settings, adding them to this (comma-separated) list as trusted IPs/subnets will bypass this blocking.
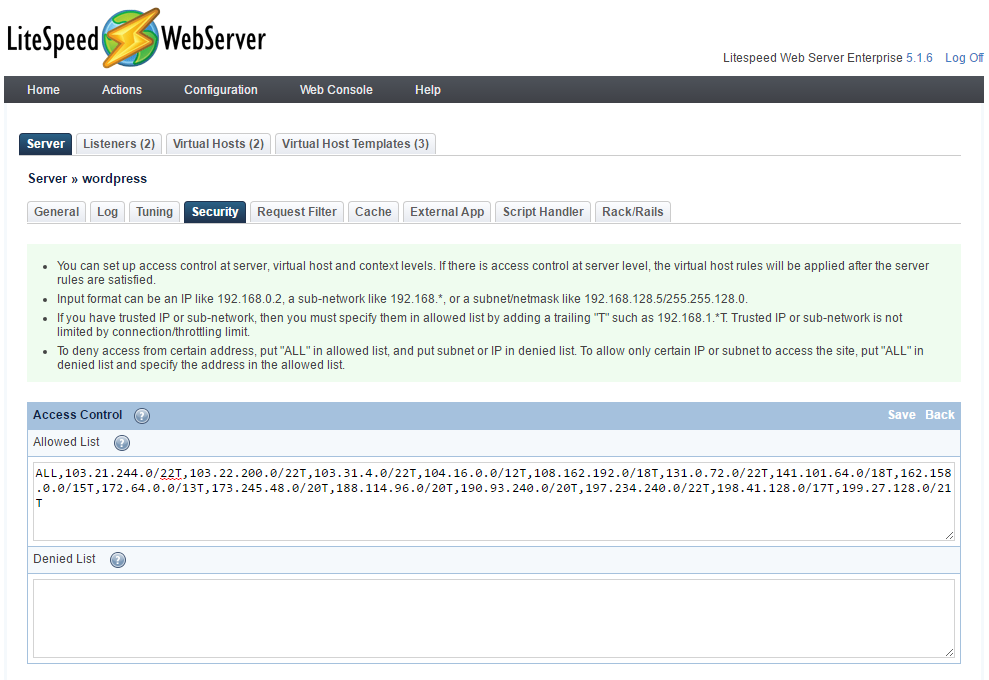
To do this, simply append a trailing T to the IP, subnet, or subnet/netmask and click Save at the top right of the Access Control section. For example:
ALL,192.0.2.0/24T,192.0.2.1/24T,192.0.2.2/24T
If there is another layer of proxy set up in front of LiteSpeed Web Server on the same server box (e.g. Cloudflare Railgun, nginx, or Varnish), you also need to add that server IP to the trusted list.
Lastly, you must now perform a graceful restart to update your server. Do this by clicking Graceful Restart under the Actions menu at the top in the LSWS WebAdmin Console.
Cloudflare proxy IPs
Note
Cloudflare and QUIC.cloud IP addresses are automatically considered trusted IPs by default. This documentation—though originally written with Cloudflare in mind—is still valid for other CDNs or proxies whose IP addresses are not automatically recognized by LiteSpeed Web Server.
When using a CDN or other proxy in front of your LiteSpeed Web Server, you may see a proxy IP instead of the real IP addresses of visitors.
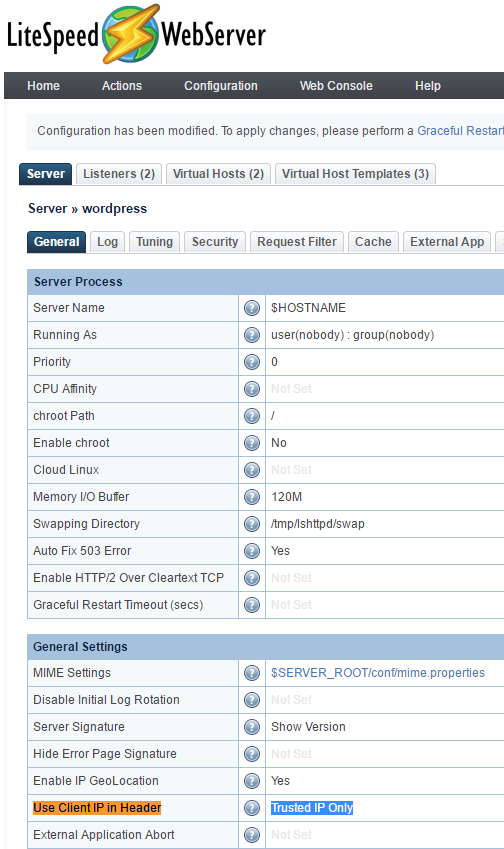
To restore real visitor IPs, you will need to add the proxy's IPs to the Allowed List as instructed above, then navigate to LiteSpeed WebAdmin Console > Configuration > General Settings and set Use Client IP in Header to Trusted IP only.
Warning
If Use Client IP in Header is set to Yes instead of Trusted IP only, clients can spoof IPs with the X-Forwarded-For header. This is not recommended!
Once enabled, your access logs will show the correct IP addresses and even PHP's $_SERVER['REMOTE_ADDR'] variable will contain your visitors' real IP addresses instead of a proxy IP address. This will resolve most problems that might occur when enabling proxies or CDNs on PHP-enabled websites (like WordPress or vBulletin installations).
Please be aware that only the access log shows real visitor IPs. The error log still shows IPs of the proxy servers. This may change in a future release.
Railgun compatibility
If you're using Railgun on your website, or on any of the websites on your server, doing the above steps might not be enough for getting the real IP of the user, since Railgun acts as an additional layer of proxy between Cloudflare and your server.
In such a case, please also add the Railgun server's outbound IP into the Allowed List as a Trusted IP, as described above. This should be in addition to the Cloudflare IPs. If Railgun is installed on the same server as the webserver, you can add the outbound IP of that server.