Configuration
System Config Page
After installation, start here: Stores > Configuration. This is where you tell Magento to use LiteMage, and then give LiteMage some basic instructions.
System Tab
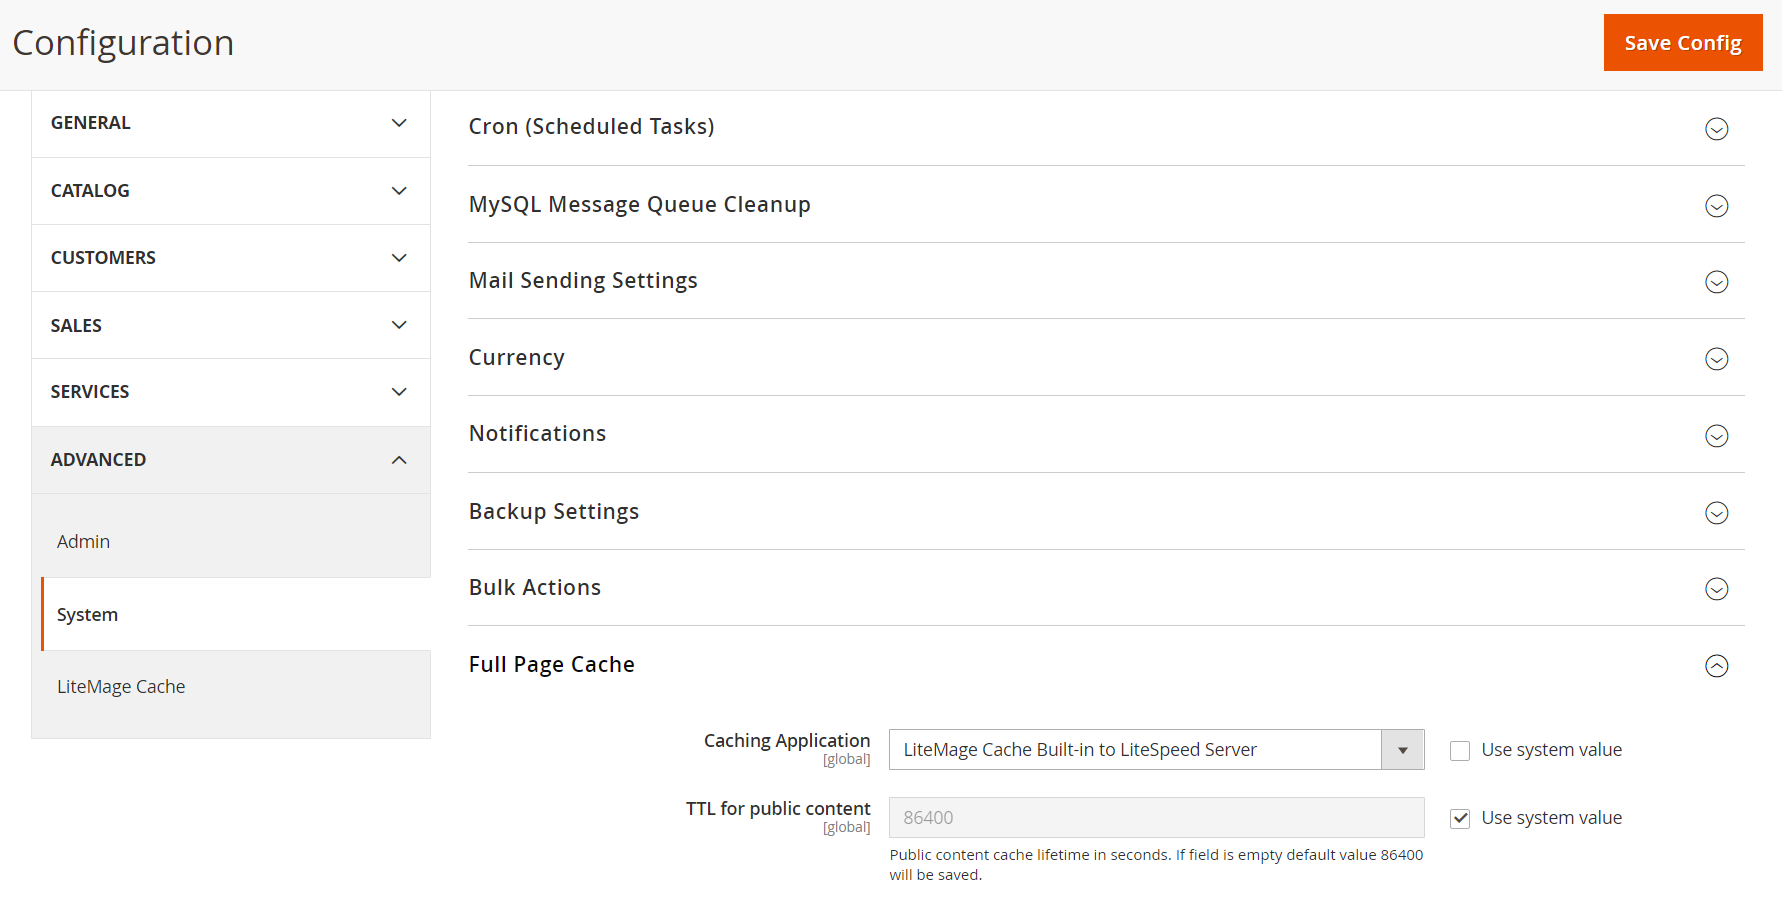
Magento has a built-in full page cache, so if you want to use LiteMage, you need to change the default. In the Full Page Cache section of the System tab, next to Caching Application, make sure Use system value is unchecked, and then choose LiteMage Cache Built in to LiteSpeed Server from the drop-down.
You can change how quickly content expires, if you wish. Under TTL for public content, uncheck Use system value, and enter your preferred TTL in seconds.
Press the Save Config button when you finish making changes.
LiteMage Cache Tab
General Settings
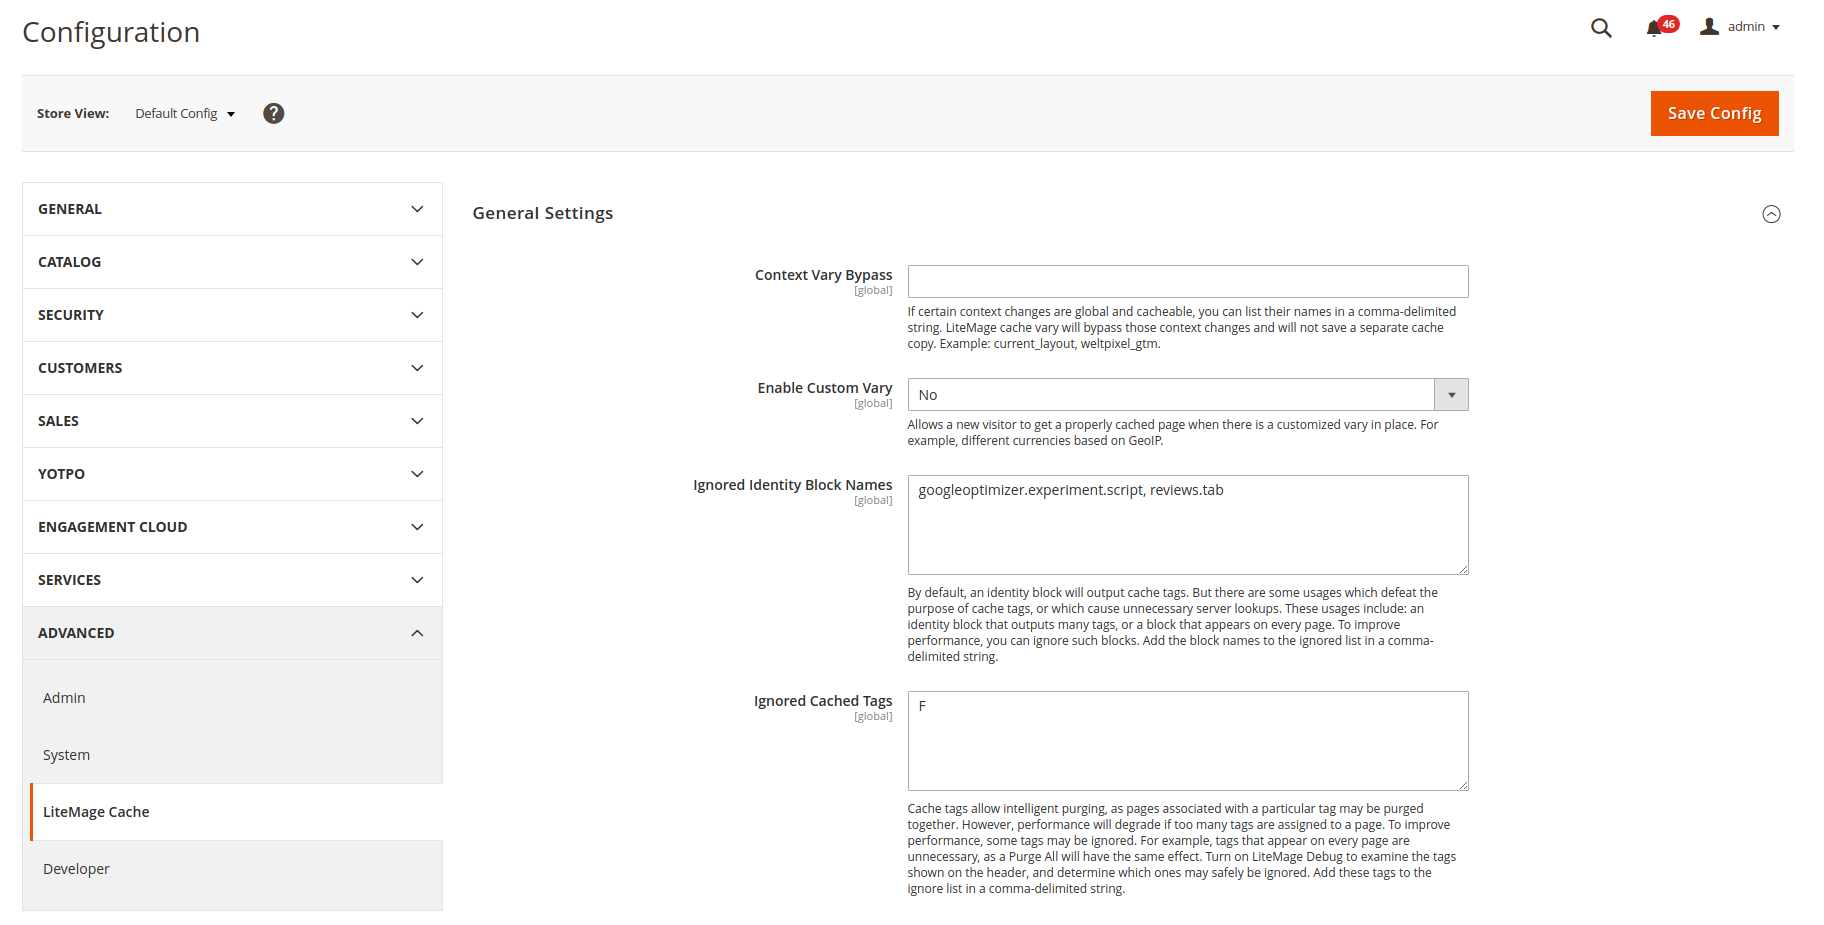
Context Vary Bypass
By default, LiteMage does not cache if there's a context vary change in the response. Context Vary Bypass allows you to override this behavior for global, cacheable contexts. List the context variables here in a comma-delimited string, and LiteMage will cache them despite any changes.
Enable Custom Vary
Enable Custom Vary controls whether to allow customized varies (for example, different currencies based on GeoIP). And if it is allowed, you must choose how to handle a customer's first visit. Is it more important that they are served from cache for that visit? Or is it more important that the value of the context variable is evaluated immediately?
Nodoes not enable custom vary.Yes and allow guest mode for first visitensures that the customer gets a fully-cached version of the page on the first visit. However, the content served will be based on the view of a non-logged-in guest and will not take the value of the custom vary into account until the customer loads the next page.Yes and enforce vary checking on first visitwill show the customer the correct content for the custom vary, but the customer will not be served from cache until their next page load.
Ignored Identity Block Names
Identity blocks output cache tags. Cache tags are important for intelligent caching, and the ability to selectively purge groups of related cache objects. But if an identity block outputs many unnecessary tags, or the block appears on every page, this can impact performance. If you have identity blocks like these, you can ignore their cache tags and improve performance.
Add the comma-delimited block names to this list.
Ignored Cached Tags
Similar to the previous setting, this setting allows you to improve performance by ignoring unhelpful cache tags. In this case, though, you can specify a single tag instead of an entire block name.
For example, you can ignore any tags that appear on every page, since purging one of those tags is the same as running a Purge All command. There is no benefit to tracking such cache tags, and in fact, tracking them may degrade server performance.
Turn on LiteMage Debug to examine the tags shown on the header, and determine which ones may safely be ignored. Add these tags to the ignore list in a comma-delimeted string.
Purge Tuning
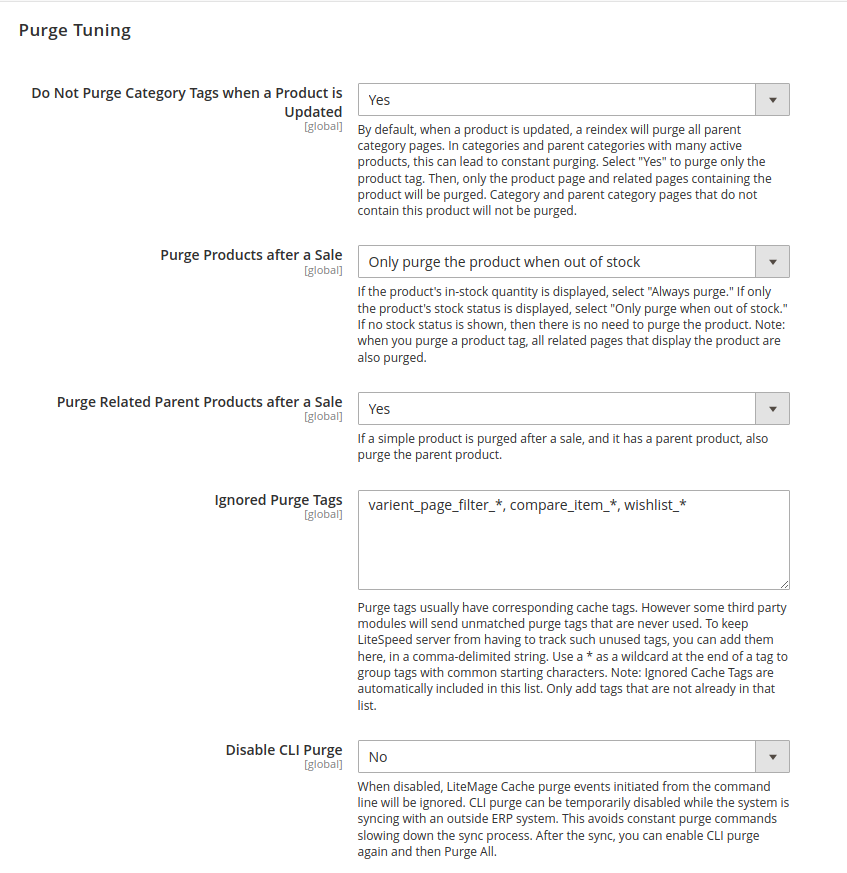
Do Not Purge Category Tags when a Product is Updated
By default, when a product is updated, a reindex will purge all parent category pages. In categories and parent categories with many active products, this can lead to constant purging.
Select Yes to purge only the product tag. Then, only the product page and related pages containing the product will be purged. Category and parent category pages that do not contain this product will not be purged.
If the default behavior of purging all parent category pages is not problematic for your store, you can select No.
Purge Products after a Sale
Depending on what information is displayed with your products, you may or may not need to purge them after a sale.
- If the product's in-stock quantity is displayed, select
Always purge the product. - If only the product's stock status is displayed, select
Only purge the product when out of stock. - If no stock status is shown, then there is no need to purge the product. Select
No.
Note
When you purge a product tag, all related pages that display the product are also purged.
Purge Related Parent Products after a Sale
This setting is for simple products that also have a parent product. If you select Yes, when such a product is purged the parent product will also be purged. If you select No, the parent product will not also be purged.
Ignored Purge Tags
Purge tags usually have corresponding cache tags. However some third party modules will send unmatched purge tags that are never used. To keep LiteSpeed server from having to track such unused tags, you can add them here, in a comma-delimited string. Use a * as a wildcard at the end of a tag to group tags with common starting characters.
Note
Ignored Cached Tags are automatically included in this list. Only add tags that are not already in that list.
Disable CLI Purge
This setting allows you to temporarily disable command-line Purge commands.
This is useful if you have an outside ERP system that periodically syncs with your system. Constant purge requests initiated from the command line can slow down the syncing process.
Disable the CLI purge during the ERP sync. Once syncing is complete, set Disable CLI Purge back to No , and flush the store's cache.
Developer Settings
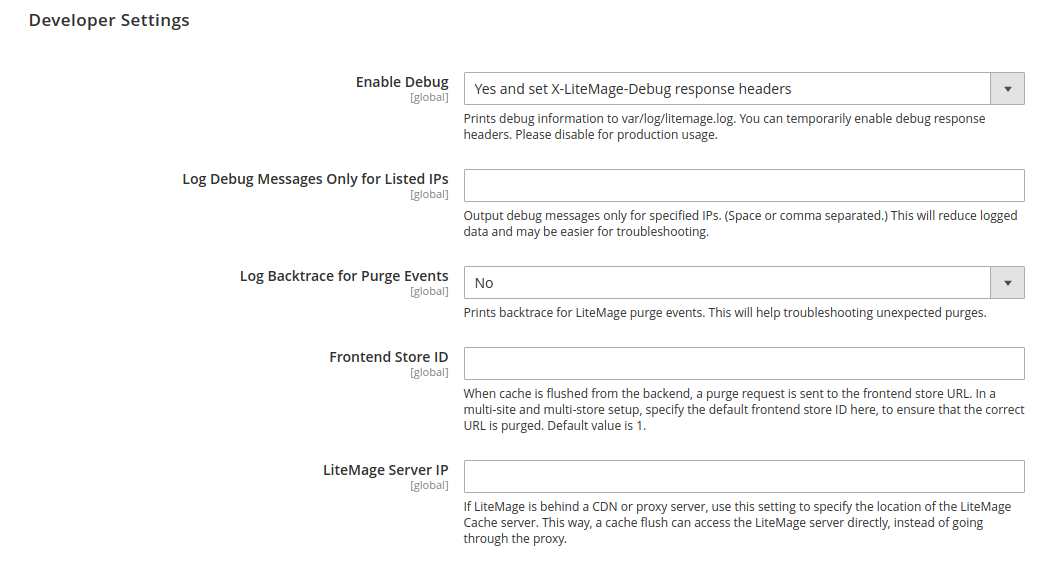
Enable Debug
You can enable debug mode, if you are trying to troubleshoot a problem. There are three options in the Enable Debug setting: No, which is the default setting; Yes; and Yes and set X-LiteMage-Debug response headers. You can learn more about what this last setting does for you in our Troubleshooting Guide.
Log Debug Messages Only for Listed IPs
In order to keep the error log size under control, and make debugging easier, you can specify one or more space-separated or comma-separated IP addresses for logging. Debug messages will only be logged for requests originating from the listed IPs.
Log Backtrace for Purge Events
This setting helps you troubleshoot unexpected purge events. When enabled, a backtrace will be logged every time the cache is purged.
Front-End Store ID
This setting allows you to determine which store is purged when the cache is flushed from the backend.
This is helpful in a multi-site and multi-store setup, where an incorrect URL might otherwise be purged.
LiteMage Server IP
If LiteMage is behind a CDN or proxy server, use this setting to specify the location of the LiteMage Cache server. This way, a cache flush can access the LiteMage server directly, instead of going through the proxy.
Cache Management Page
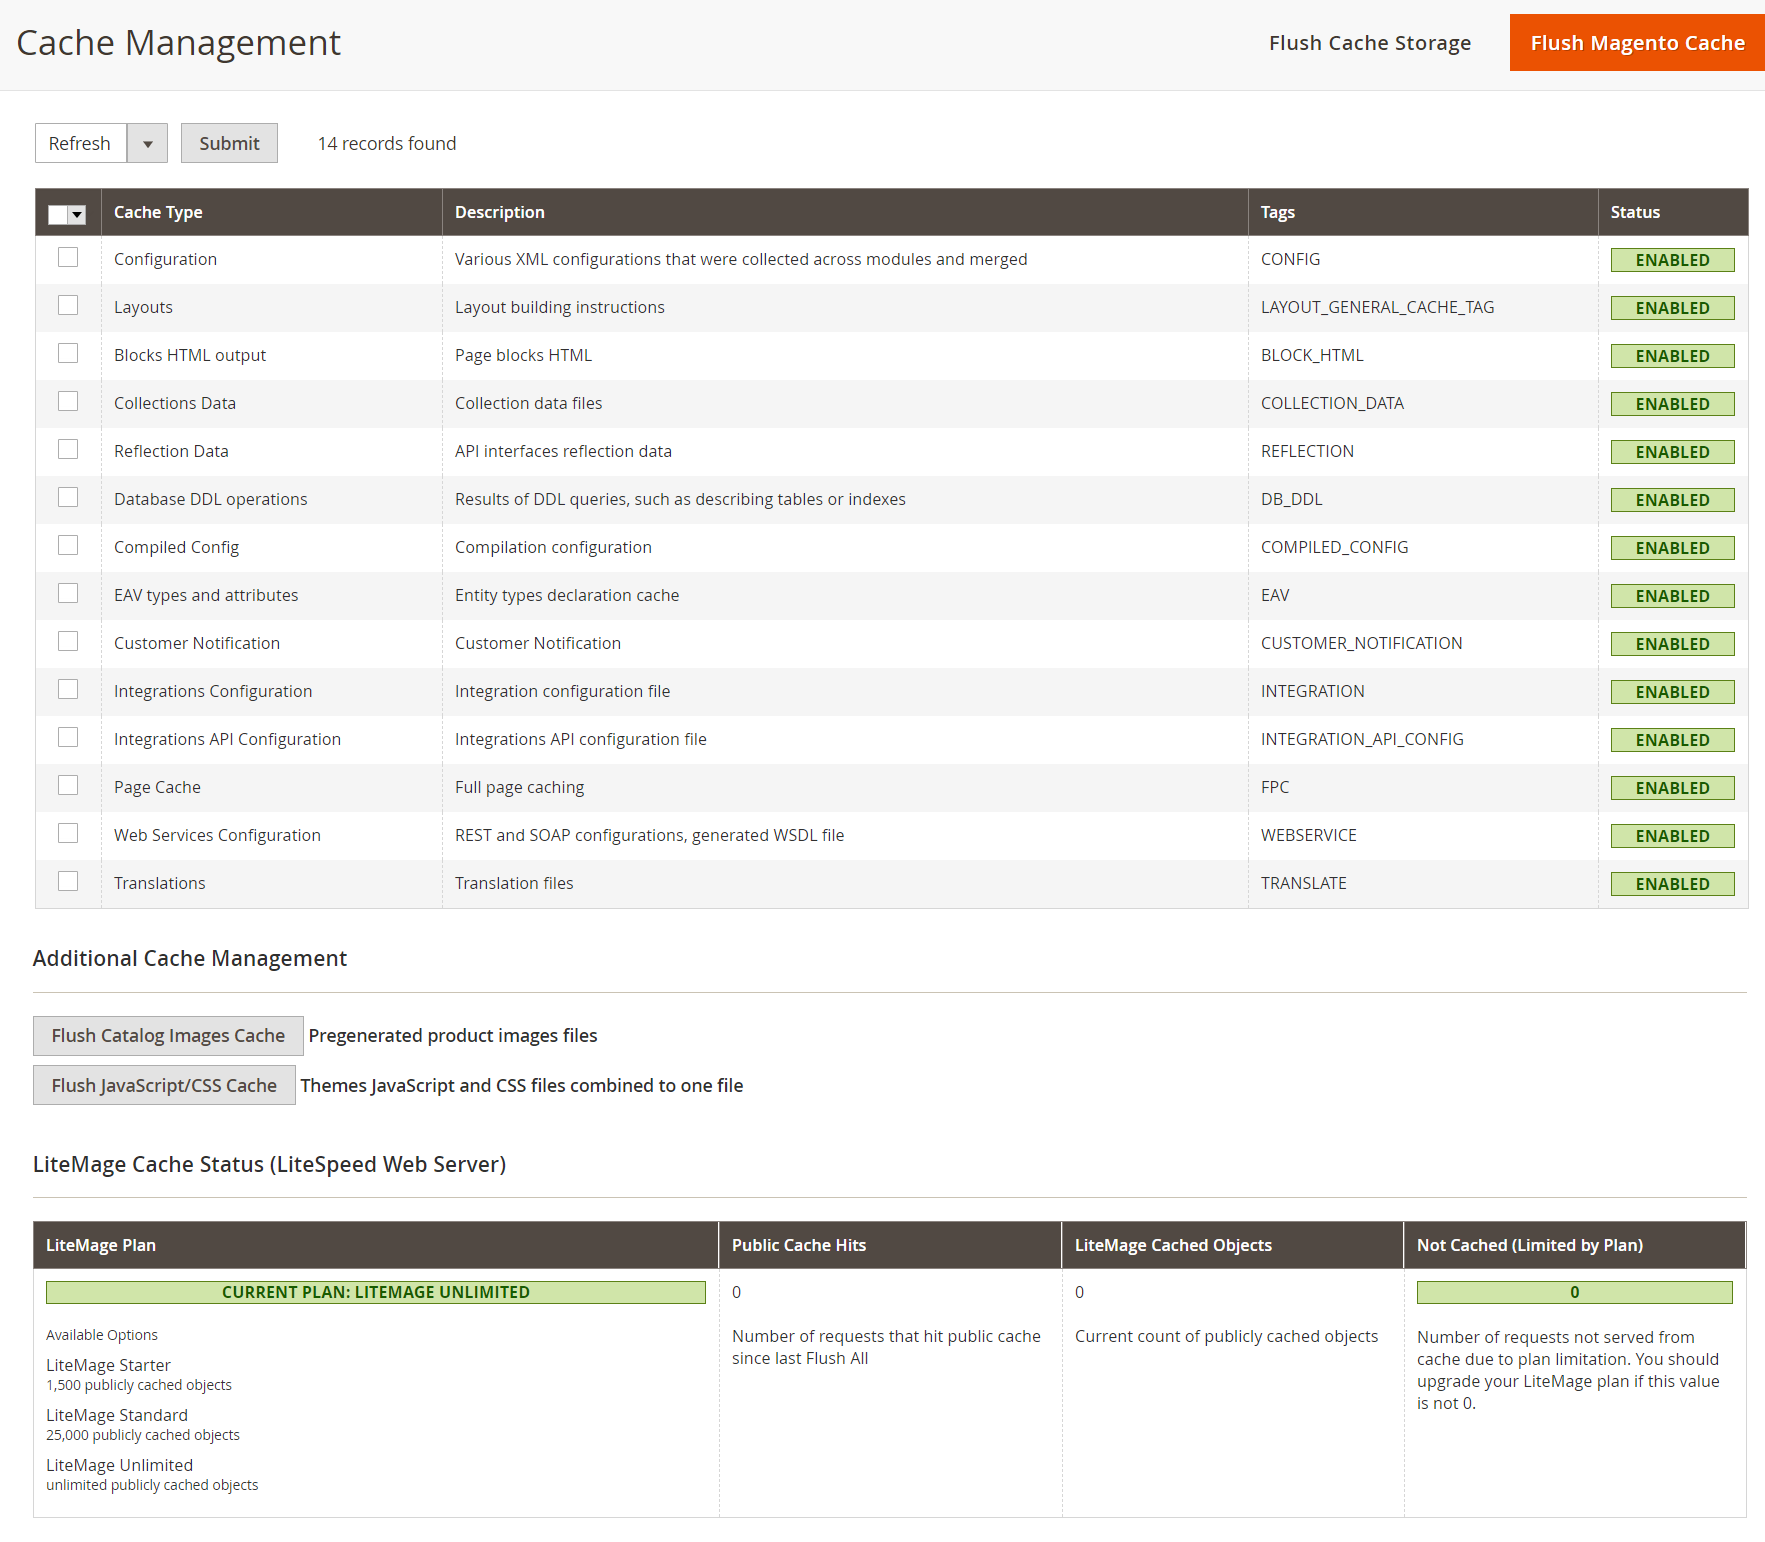
The Cache Management page (System > Cache Management) is where you enable page cache so LiteMage can work. It's also the place where you can flush the cache, and keep an eye on your LiteMage plan usage.
Enable Page Cache
If Page Cache does not have a green Enabled indicator in the Status column, then you will need to enable it. Click the checkbox next to Page Cache, select Enable from the dropdown box at the top of the table, and press Submit. LiteMage Cache will then be enabled.
You can disable LiteMage in the same manner, except you would choose Disable from the drop-down list.
Flush LiteMage Cache
The Flush Magento Cache button at the top flushes all of the enabled caches on the Cache Type list, including Page Cache, aka LiteMage.
To flush only LiteMage, click the checkbox next to Page Cache, select Refresh from the dropdown box at the top of the table, and press Submit. LiteMage Cache will then be flushed.
Check LiteMage Usage
Here's what each field of the usage chart indicates:
- Current LiteMage Plan: Your current plan, which would be
LiteMage Starter,LiteMage Standard, orLiteMage Unlimited. - Public Cache Hits: Number of requests that hit public cache since the last Flush All. This number should not be
0. - LiteMage Cached Objects: Current publicly cached object count. There should be more than
0of these. - Not Cached (Limited by Plan): Number of requests not served from cache due to plan limitations. You can upgrade your LiteMage plan if this value is not
0. If your store's number of cached objects hasn't reached the limit yet, it will show0. This is fine. It means your store is in good shape and does not require more caching than your plan can handle.
Layout File Updates
The following information is not for general users. You should have developer-level knowledge about Magento layout files before proceeding.
ESI Hole Punching
ESI allows you to punch holes on a cacheable page, and treat the content in those holes differently than the main page content. For example, you may have an ESI block for:
- Content that is cached for a different length of time than the rest of the page
- Content that is cached privately
- Content that is not cached at all
You can learn more about ESI in general here.
In Magento 2, ESI blocks are standard. They work the same way for LiteMage as they would for Varnish: by adding the ttl attribute to the block.
Example
Cache the ESI block publicly for 3600 seconds: ttl="3600"
By default, Magento 2 expects private content to be handled via Ajax. If your theme follows the standard method, you will not need an ESI block for your private content.
If your theme does not follow the Magento 2 standard for private content, you can use an ESI block for that purpose. To do so, add a - before the TTL value.
Example
Cache the ESI block privately for 3600 seconds: ttl="-3600"
If a block is privately cached, then each user will have their own cached copy. This is useful for shopping carts and other personalized content that does not conform to the standard ajax method.
Tip
Use ESI blocks for private cache judiciously, as they are not as efficient as ajax would be.
You can also add cacheable="false" to a block, but this does not make the block a non-cacheable ESI block, as you might expect. Magento's built-in logic dictates that if any block on a page is marked cacheable="false", then the entire page is considered not cacheable.
If you want to make just the ESI block non-cacheable, without affecting the main page's cacheability, give the block a TTL of -1.
Example
Do not cache the ESI block: ttl="-1"