Troubleshooting Media Issues
Image Optimization
If you are experiencing image optimization errors and you don't see the solution here, if you have a QUIC.cloud account, you can check your QUIC.cloud Dashboard at https://my.quic.cloud/dm/example.com/img_optm. (Be sure to replace example.com with your own site URL.) There should be guidance on the Dashboard that will let you know how to proceed.
If you are still unsure, or you are an anonymous QUIC.cloud user with no Dashboard, then please create a ticket and include your site's Report Number.
Trouble Getting Started
If you are having difficulty getting your first images optimized, try these steps to get the process started:
- Have you enabled QUIC.cloud services? If not, do so.
- Is your server IP accurate? It should either be empty, or it should be set to your server's correct IP address.
- If your domain is linked to QUIC.cloud, then visit your QUIC.cloud Dashboard, and check Domain > Settings to be sure the Server IP is set to your server's correct IP address.
- If you have firewall, please make sure that our IPs are not blocked. They should be allowlisted.
- If you have a security plugin, please make sure that WP REST API is not disabled.
Out of Quota Warning
Everyone receives a free quota to use with each of the online services. This quota resets at the beginning of every month.
For Image Optimization, there are two request queues. Quota applies to usage of the Fast Queue, while the Standard Queue remains free and unlimited.
If you are seeing a message that you are out of quota for the month, this should not be happening. You should always be able to submit images via the Standard Queue, even if you are out of Fast Queue quota. To solve this problem, try disconnecting and re-enabling QUIC.cloud services.
Then try submitting your images again.
Limit Stuck at 1
Image Optimization always starts with a limit of 1. This is used as a test run to make sure that the Image Optimization servers are able to connect to your server.
If your Image Optimization limit is at 1 and it does not increase after a few requests, check the following to determine a proper remedy:
First, navigate to LiteSpeed Cache > Image Optimization > Image Optimization Summary and check the Image Optimization Status > Failed Image Optimization counter. It is likely increasing. This can be one of several issues:
- The image is already optimized: This is not a cause for concern. It will keep trying other images, and when an unoptimized one is found, the limit will increase.
- The Image Optimization server is unable to find your image: Please check your rewrite rules and links.
- The Image Optimization server is unable to connect to your server: To fix this, add the QUIC.cloud IP list to your allowlist.
If you have a QUIC.cloud account, please check our QUIC.cloud documentation for further information on how to check your Image Optimization status.
No Valid Image Found
Error Message:
No valid image found in the current request.
To clear this error, navigate to LSCache > Image Optimization and click the Rescan New Thumbnails link.
Too Many Requested Images
Error Message:
You have too many requested images, please try again in a few minutes.
This error occurs when the current count of images sent for optimization exceeds 200. This is simply a safety mechanism, to ensure a site doesn't send thousands of images for optimization without confirmation that optimization is actually ongoing.
Wait a few minutes for the service to finish some of the requested images before sending a new batch.
Too Many Notified Images
Error Message:
You have too many notified images, please pull down notified images first.
If you have more than 1000 images listed as "notified" (meaning, they are ready to pull down), new requests are blocked. You should pull the optimized images prior to sending new ones.
You can manually pull images down, or, you can have them automatically pulled by WP-Cron. For the latter, set LSCache > Image Optimization > Image Optimization Settings > Auto Pull Cron to ON.
If the cron is failing to pull your images, you can try this command to see what happens:
wp cron event run --due-now
Failed to Retrieve Image
Error Message:
Failed to retrieve image for optimization
This error, which you may see on your QUIC.cloud Dashboard if you have a QUIC.cloud account, indicates that the image to be optimized no longer exists at the original URL that was submitted. You may see this if you have moved image files.
Failed to Retrieve Original Image
Error Message:
Failed to retrieve original image
This error, which you may see on your QUIC.cloud Dashboard if you have a QUIC.cloud account, indicates that there was an md5 mismatch between the original image on your site, and the copy that was retreived. This can happen if you've used plugins that modify images in some way, such as resizing thumbnails.
Failed to Notify WP
Error Message:
Failed to notify WP to pick up optimized images
This error, which you may see on your QUIC.cloud Dashboard if you have a QUIC.cloud account, indicates that QUIC.cloud was unable to inform your WordPress installation that images are ready to be pulled. This may happen if QUIC.cloud IPs are not allowlisted at the firewall, or if there is some other kind of error communicating with your site.
Next-Gen Image Formats
WebP/AVIF Images Not Generated
If WebP or AVIF images can't be found in your file system, it is usually due to one of two reasons:
- Next-Gen Image Format was selected too late: a format should be selected before you begin Image Optimization. If you enable WebP or AVIF after you have already begun Image Optimization, next-gen files will not be created for any images that have already been processed. If you wish to create WebP/AVIF files for images that were already optimized, then you will need to Soft Reset Image Optimization Counter so next-gen formats can be created for those earlier images.
- The WebP or AVIF file is bigger than the JPEG: When Image Optimization creates a next-gen file, if it is larger in size than the JPEG, the next-gen file is discarded, since there is no benefit to serving a larger next-gen file over a smaller JPEG.
Once all of the site's image optimization is complete, if you have a question about the WebP or AVIF for a particular image, you can try optimizing it again and see what happens. here's how:
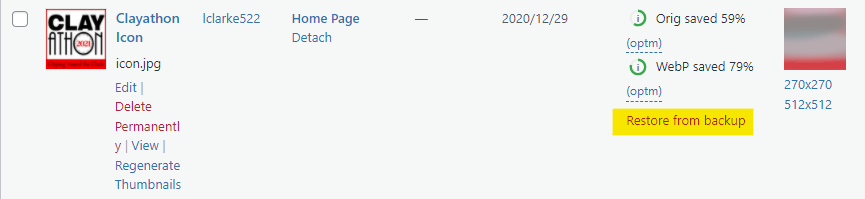
- Hover over the image in the Media Library and click on the Restore from backup link that appears. This will remove the optimized files and restore the image to its unoptimized state.
- Navigate to LiteSpeed Cache > Image Optimization and Click the Gather Image Data button, followed by the Send Optimization Request button. The image you restored will be optimized along with any new Media Library items that were waiting for optimization (alternatively, if your Image Optimization is handled automatically by cron, you could just wait, and the image will be sent with the next automatic batch).
- Check the image in the Media Library again once optimization is complete. Is there a WebP or AVIF now? If not, then it's probably a case where the next-gen version of the image was discarded because it was too big.
Tip
The WebP or AVIF indicator next to a Media Library image indicates that next-gen images were generated for at least one of the image sizes in that group. It is possible, however, that some image sizes do not have corresponding next-gen versions. When this happens it is usually because the next-gen image was not smaller than the JPG or the PNG.
WebP/AVIF Not Loading
If you've generated next-gen images through Image Optimization, but they are not showing on the front end, there may be a few reasons:
- Not all browsers support WebP or AVIF. Make sure you are using one that does.
- The plugin can only perform next-gen replacement on the HTML
<img>tag. If the image is loaded via CSS, JS, or some other means, LSCache may not be able to correctly insert the next-gen file. - Are you sure the WebP or AVIF file actually exists? You can add
.webpor.avifto the end of any image file to see if a next-gen version exists. For example, if you have an imagehttps://www.example.com/wp-content/uploads/2020/02/test.jpg, enterhttps://www.example.com/wp-content/uploads/2020/02/test.jpg.webpinto a browser that supports WebP images. If the WebP image exists, it will display. If it doesn't exist, please see WebP/AVIF Images Not Generated for further troubleshooting.
If you are still unsure what is going on, the Debug Log might help. Here's how to check it:
- Navigate to Toolbox > Debug Settings, set Debug Log to
ONand Debug Level toAdvanced. - Navigate to Toolbox > Purge and click the Purge All - LSCache button.
- Visit your website, and view the page where you think the next-gen image file should display.
- Back in the WordPress Dashboard, navigate to Toolbox > Log View and see if the Debug Log can clear up the mystery.
- Navigate to Toolbox > Debug Settings and set Debug Log to
OFF.
Some WebP/AVIF Load, Some do Not
If you have a situation where next-gen versions of all of your images definitely exist in the file system, but only some of them are being served, take a look at the way those images are referenced. Does the domain name match the Settings > General > Site Address (URL) setting? If it doesn't match, then the JPEG will not be replaced with WebP.
Example
Your site address is www.example.com, and the page refers to two images: one at www.example.com/image1.jpg, and the other at example.com/image2.jpg. Only the image1 WebP (from the www domain) is being displayed, while image2 (from the naked domain) is still being shown as a JPEG.
Make sure that your images are prefaced with an accurate site address, and next-gen image files will be displayed, if they exist, and if the browser supports it.
Lazy Load
Third Party Conflicts
Modern page builders such as Elementor and Visual Composer, as well as many WordPress themes and plugins related to handling media files, include Lazy Load as a core functionality. To avoid conflicts, we recommend that you only enable Lazy Load in a single plugin (LiteSpeed Cache), and disable it in any other plugin or theme you are using.
Excluding Images
If you find some images should not be lazy loaded, you can exclude them in LiteSpeed Cache > Page Optimization > Media Excludes. Add the URL to Lazy Load Image Excludes.
Alternately, if you are a developer, you can add the attribute data-no-lazy="1" to the image in your HTML code.
Logo disappears on page refresh
If your site's logo disappears each time you refresh the page, but then it comes back after a brief delay, this is likely because the LiteSpeed plugin is lazy loading the image.
To address this, you need to exclude the logo image URL or filename from Lazy Loading. Here's how:
- Copy the filename or URL for the logo
- Navigate to Litespeed Cache > Page Optimization > Media Excludes
- Find the Lazy Load Image Excludes setting
- Paste the logo filename or URL into the text box and click the Save Changes button
- Purge the site's cache, either via the Admin Bar's LiteSpeed icon, or via the Toolbox > Purge > Purge All - LSCache button.
Return to your WordPress site front end and refresh the page. Your logo image should now remain visible even after a page refresh.
Tip
To force all above-the-fold images on every page to be excluded from lazy load, try the QUIC cloud Viewport Images (VPI) service.