cPanel Plugin
Where did this plugin come from?
The LiteSpeed Web Cache Manager plugin for cPanel is a companion plugin to the LiteSpeed plugin for WHM. If a hosting provider is using both LiteSpeed Web Server and the LiteSpeed plugin for WHM, they are able to install this plugin for their cPanel end-users.
Installation
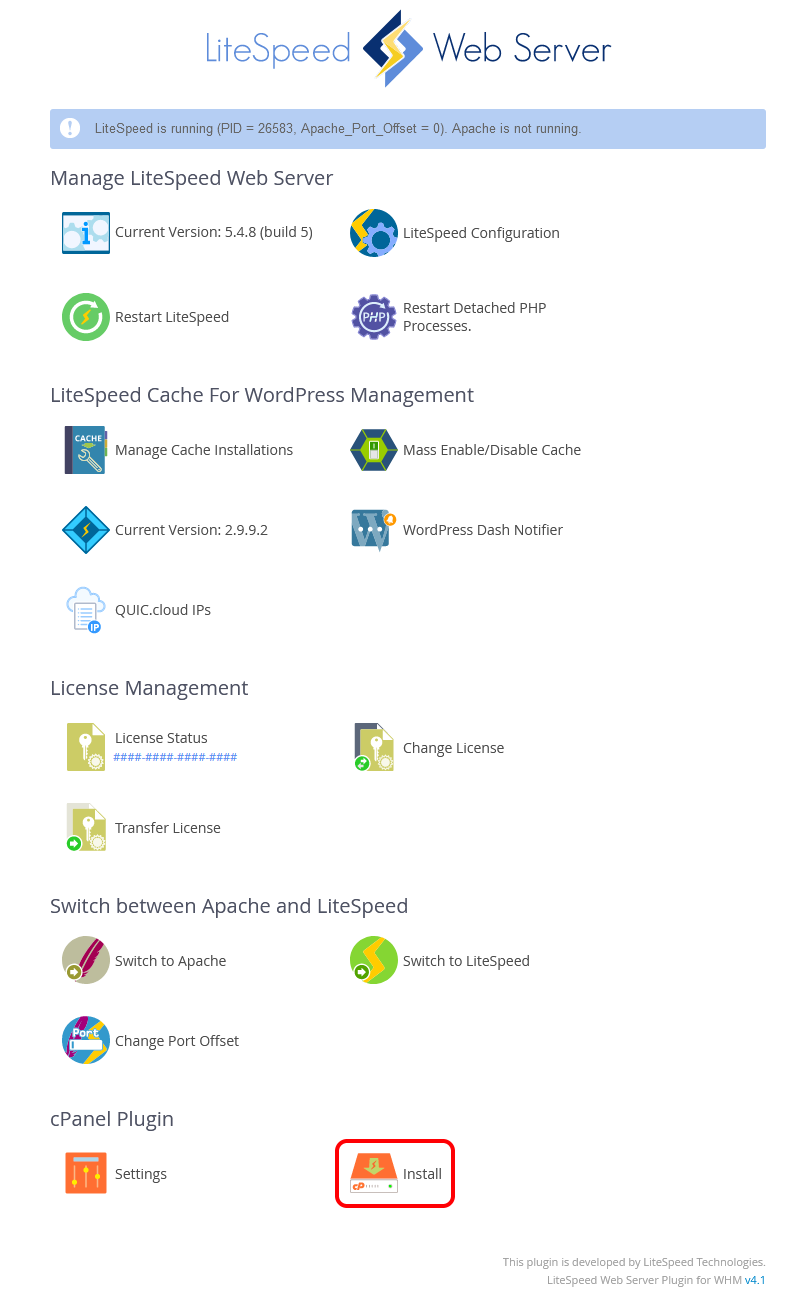
In the LiteSpeed WHM Plugin, scroll down to cPanel Plugin and click the Install link.

Once successfully installed, the link in the cPanel Plugin section of the WHM plugin should change from Install to Uninstall.
Alternatively, you can install the cPanel plugin from the command line with the following command:
/usr/local/lsws/admin/misc/lscmctl cpanelplugin --install
Note
Updates for the cPanel plugin are bundled with WHM plugin updates. There is no way (and no need) to update the cPanel plugin on its own. Update the WHM plugin and any cPanel plugin updates will also be installed.
Plugin not available for cPanel users
If the LiteSpeed Web Cache Manager plugin is not appearing for cPanel users after installing through the LiteSpeed WHM plugin, please try the following:
-
Log in to WHM and navigate to the Feature List screen by selecting Packages > Feature Manager.
-
From here you can add or remove user access to plugins by creating or editing feature lists.
-
Create or edit the feature list you wish to modify.
-
Click the checkbox labelled LS Web Cache Manager and then press the Save button. This will add or remove this plugin in your current feature list, which can then be assigned to a package if it has not been already.
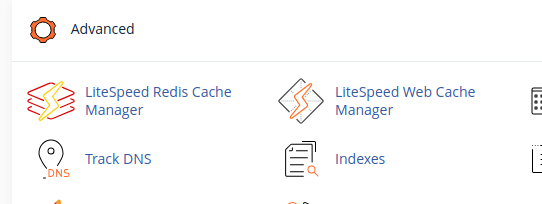
This plugin should now appear in the Advanced section of the cPanel home screen for all users assigned this package.
If you do not see the LiteSpeed Web Cache Manager item in the advanced section of your cPanel home screen, please upgrade LiteSpeed Web Server to v5.1.x at the minimum.
You must have a license with LSCache enabled to use these features. How To Get LSCache
Note
If you would like to install the LiteSpeed Web Cache Manager plugin but do not have WHM access, please contact your server administrator or hosting provider.
LiteSpeed Redis Cache Manager is only available if you have a sandbox-capable system (CloudLinux or LiteSpeed Containers) and consists only of the Redis features described below.
Configuration
The LiteSpeed Web Cache Manager plugin for cPanel can be further configured from the Settings page under the cPanel Plugin section of the LiteSpeed WHM plugin.

The following subsections will explain each available setting in detail.
Auto Install
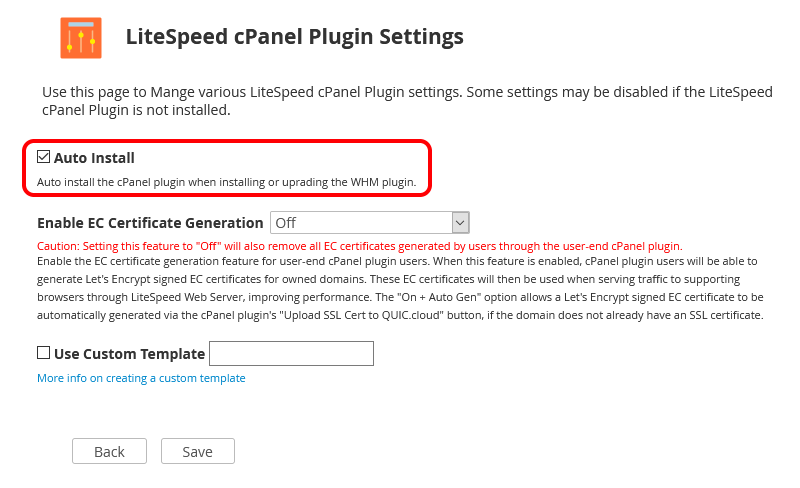
The Auto Install setting controls whether the LiteSpeed Web Cache Manager plugin for cPanel is automatically installed when installing or upgrading the LiteSpeed WHM plugin.
Note
This option will be automatically checked after manually installing the LiteSpeed Web Cache Manager plugin for cPanel through the LiteSpeed WHM plugin. This option will be automatically unchecked after manually uninstalling the LiteSpeed Web Cache Manager plugin for cPanel through the LiteSpeed WHM plugin.
Enable EC Certificate Generation
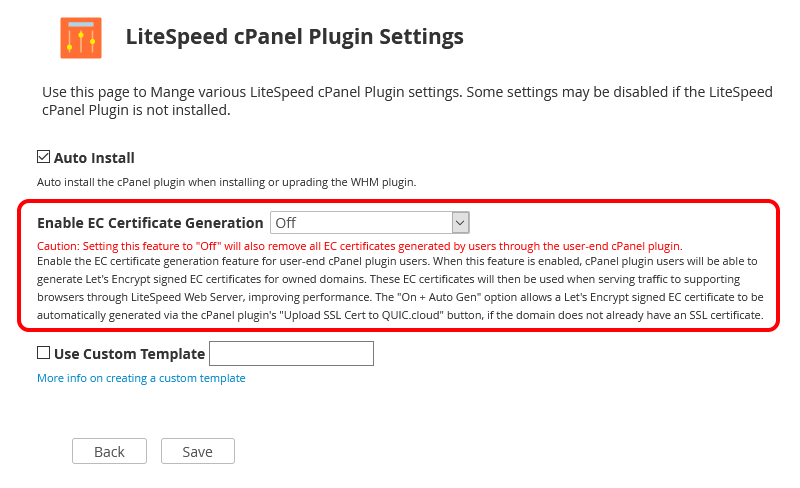
- Available in LiteSpeed WHM plugin v4.1+
The Enable EC Certificate Generation controls whether the EC certificate generation feature is available in the LiteSpeed Web Cache Manager plugin for cPanel. Once generated for a domain, LiteSpeed Web Server will use this certificate when establishing an SSL connection with supporting browsers -- improving performance in comparison to SSL connections established with an RSA certificate.
When set to
Off: EC certificate generation will be disabled, and the related EC Certificate Management section of the LiteSpeed Web Cache Manager plugin for cPanel will not be displayed.
On: EC certificate generation will be enabled, and the related EC Certificate Management section of the LiteSpeed Web Cache Manager plugin for cPanel will be displayed.
On + Auto: Behavior is similar to On, with the addition of automatically generating an EC certificate when using the Upload SSL Cert to QUIC.cloud feature if an existing SSL certificate cannot be detected for the related domain.
Warning
Changing this setting to Off will also remove all EC certificates generated through this feature.
Use Custom Template
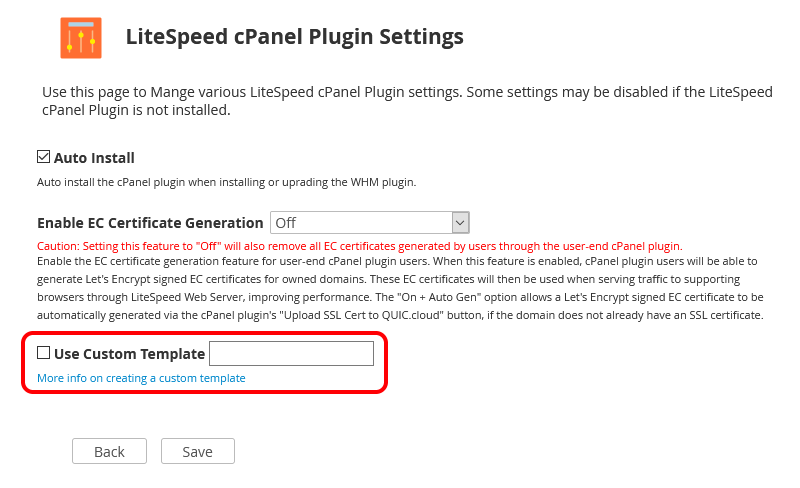
The Use Custom Template setting can be used by hosting providers to load a custom template to modify or completely replace the content of the LiteSpeed Web Cache Manager plugin for cPanel landing page for all cPanel users without modifying existing plugin files directly.
This provides an easy way to modify the plugin to advertise features or specialized services or recommend/upsell related hosting packages.
Preparing and setting a custom template
Preparing and using a custom template for the LiteSpeed Web Cache Manager plugin for cPanel is an easy process. Simply navigate to /usr/local/cpanel/base/frontend/paper_lantern/ls_web_cache_manager/landing and create a directory named for your custom template, such as myCustomTemplate.
Once you have created the template directory, you can either copy the existing index.php file under /usr/local/cpanel/base/frontend/paper_lantern/ls_web_cache_manager/landing/default into this directory to get started, or copy over your own version from elsewhere. This file will handle calling any custom code or files you need to manage. It will display the new landing page while still having relative access to all the existing classes, functions, and pages already built into the plugin.
Tip
We strongly recommend backing up all custom template code in a different location to prevent possible loss during uninstall or upgrade of the LiteSpeed Web Cache Manager plugin. As such, we also recommend using a symlink in place of these files in the actual plugin location.
Note
To set a custom template for use, first make sure that the LiteSpeed Web Cache Manager plugin has been installed through the LiteSpeed WHM plugin.
We can now enter our prepared custom template, myCustomTemplate, into the Use Custom Template setting field on the cPanel Plugin Settings page, and save. If the template folder exists and contains the required index.php file, the save operation should succeed. From now on, all cPanel users should see your custom landing page when accessing the LiteSpeed Web Cache Manager plugin through the cPanel dashboard.
Uninstallation

In the LiteSpeed WHM Plugin, scroll down to cPanel Plugin and click the Uninstall link.
Or, run the following command as root from the command line:
/usr/local/lsws/admin/misc/lscmctl cpanelplugin --uninstall
Warning
Uninstalling the LiteSpeed Web Cache Manager Plugin for cPanel will also remove all user generated EC certificates. (Applies when On or On + Auto is selected for the Enable EC Certificate Generation setting on the LiteSpeed cPanel Plugin Settings page)
Plugin breakdown
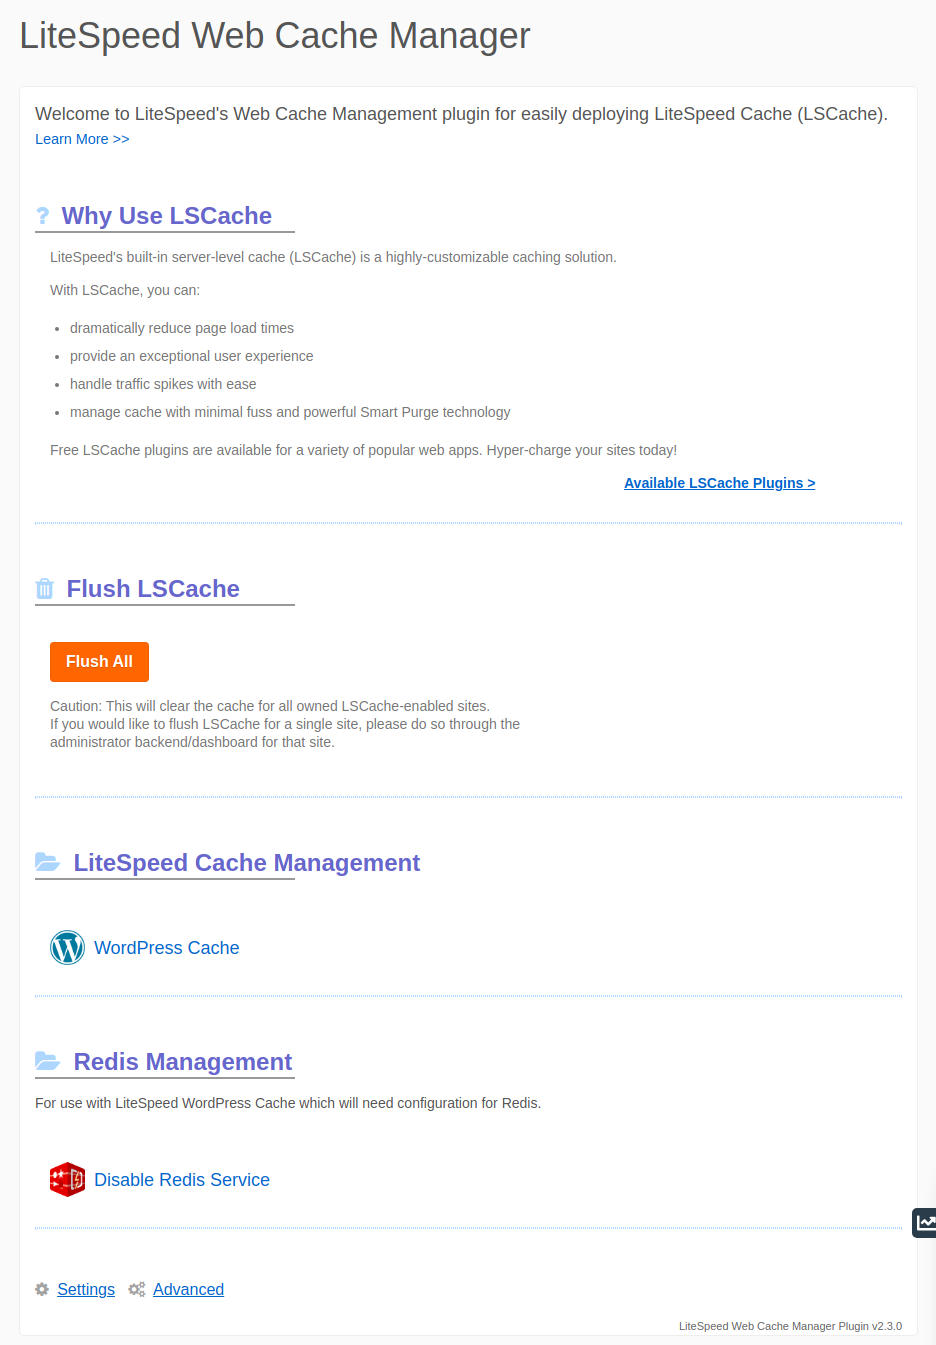
Main page
This is the first page shown when visiting the plugin page. Here you will be presented with 5 sections and a link to the settings and advanced operations pages.
-
Why Use LSCache? - Contains some information on LSCache and the various available LSCache plugins through the Available LSCache Plugins link.
-
Flush LSCache - This section contains a button for flushing the contents of your LSCache folder. This will clear the cache for all owned sites with LSCache enabled.
-
LiteSpeed Cache Management - This section contains a link to the LiteSpeed Cache Management page for owned WordPress sites where LSCWP can be selectively enabled and disabled on a per site basis.
-
EC Certificate Management - This section contains a link to the "Manage EC Certificates" page for owned domains where EC SSL certificates can be generated or removed on a per-domain basis.
-
Settings - This link will take you to the plugin settings page.
-
Advanced - This link will take you to the advanced operations page.
The LiteSpeed Cache Management, EC Certificate Management, Settings, and Advanced Operations pages will be covered in more detail below.
LiteSpeed Cache Management - WordPress cache
The manage view is where most of the magic happens. Here you can manage LSCWP for your WordPress installations individually or in groups.
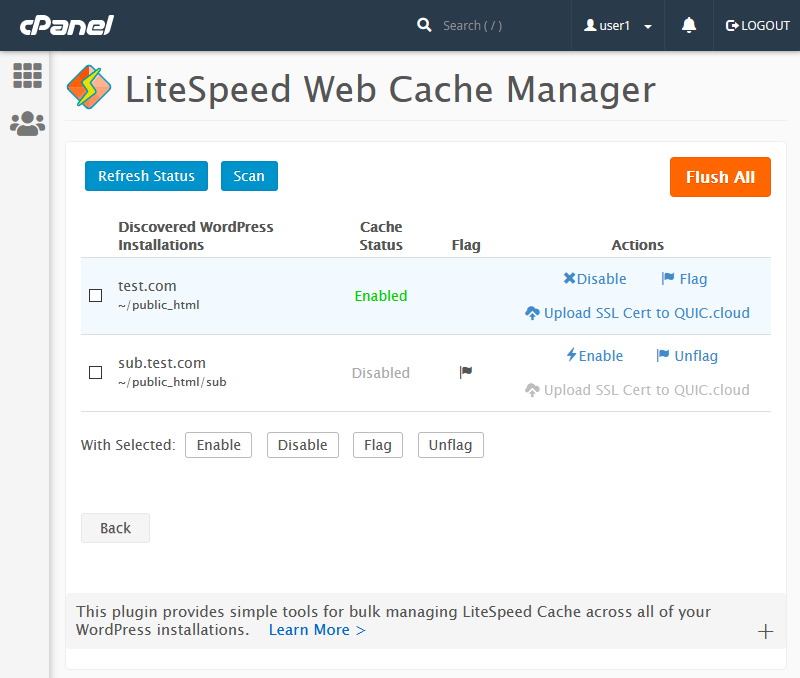
Starting from the table we have the following fields:
-
Discovered WordPress Installations: This field contains the path of each WordPress installation discovered during the last scan operation.
-
Cache Status: Displays the last known status of LSCWP for the listed WordPress installation.
-
Flag: This field can either be blank or display a flag icon. While an installation is flagged (in other words, displaying the flag icon), it will be excluded from all future Mass Enable/Disable LSCWP operations in the WHM plugin.
-
Actions: This field contains action buttons that perform a specific action only for the related WordPress installation. These actions include Enable/Disable LSCWP, Flag/Unflag this installation, and Upload SSL Cert to QUIC.cloud for this domain.
Looking at the top row of buttons, we have Refresh Status, Scan/Re-scan, and to the right, Flush All.
-
Refresh Status: Each listed WordPress installation will have an LSCWP Status reflecting the status of LSCWP for that installation. The Refresh Status button will update this value to the most current status for all listed WordPress installations.
-
Scan/Re-scan: Discovers all WordPress installations under each cPanel user's known document root. These discovered installations will then be saved to a data file and displayed on the manager screen. If this data file is removed or corrupted, simply scan again to repopulate the list.
-
Flush All: Like the button of the same name on the main page, this button will flush the contents of your LSCache folder. This will clear the cache for all owned sites with LSCache enabled.
Moving on we have the bottom row of buttons which are used to perform group operations. These buttons work in tandem with the check-boxes found next to each discovered installation to allow you to perform some basic operations for only the selected group.
-
Enable Selected & Disable Selected: These buttons allow you to enable and disable LSCWP for the selected WordPress installations.
-
Flag Selected & Unflag Selected: These buttons allow you to set or unset the flag field for the selected WordPress Installations. Flagged installations will be excluded from Mass Enable/Disable LSCWP operations in the WHM plugin.
EC Certificate Management - Manage EC certificates
Here you can manage generated EC certificates for your owned domains individually or in groups.

Starting from the table we have the following fields:
-
Discovered Domains: This field contains the domain name and path of each domain discovered during the last scan operation.
-
EC Cert Exists: Displays whether a generated EC certificate exists for the listed domain based on the result of the last performed EC certificate action as well as the relevant generate/remove action button if applicable.
-
Domains Covered By Cert: Displays all domains currently covered by the generated EC certificate. Blank if generated EC certificate does not exist.
-
Last Generation Message: Displays the last EC certificate generation message returned for this domain.
Looking at the top row of buttons, we have Update List, Generate All, and Remove All.
-
Update List: Discovers all owned domains. These discovered domains are then saved to a data file and displayed on the manager screen. If this data file is removed or corrupted, simply scan again to repopulate the list.
-
Generate All: Attempt to generate an EC certificate for all discovered domains.
-
Remove All: Remove all generated EC certificates for all domains.
Moving on we have the bottom row of buttons which are used to perform group operations. These buttons work in tandem with the check-boxes found next to each discovered domain to allow you to perform some basic operations for only the selected group.
- Generate Selected & Remove Selected: These buttons allow you to generate and remove generated EC certificates for the selected domains.
Settings
The Settings page allows you to control the various plugin related settings (only one at the moment).
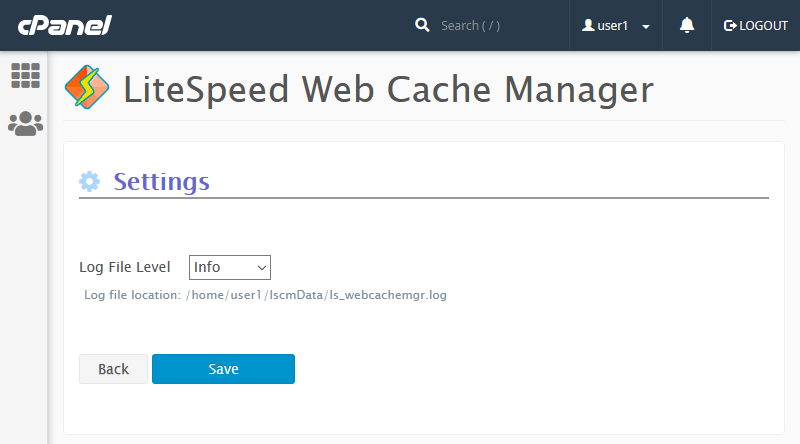
- Log File Level: This setting controls the highest level of log messages that will be written to the log file located at
/home/$user/lscmData/ls_webcachemgr.log. The default value isINFO.
Advanced
The Advanced Operations page allows you to perform various advanced plugin operations (only one at the moment).
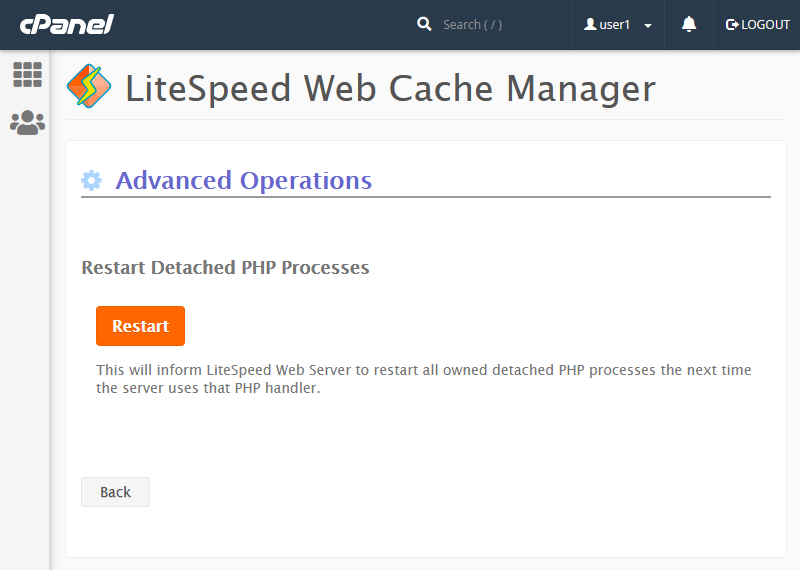
- Restart Detached PHP Processes - Used to inform LiteSpeed Web Server to restart all detached PHP process for this user the next time the server uses that PHP handler.
Redis management
If you have a sandbox-capable system like CloudLinux or LiteSpeed Containers, you can use Redis Management, available from the cPanel Advanced group, LiteSpeed Redis Cache Manager to enable or disable the service.
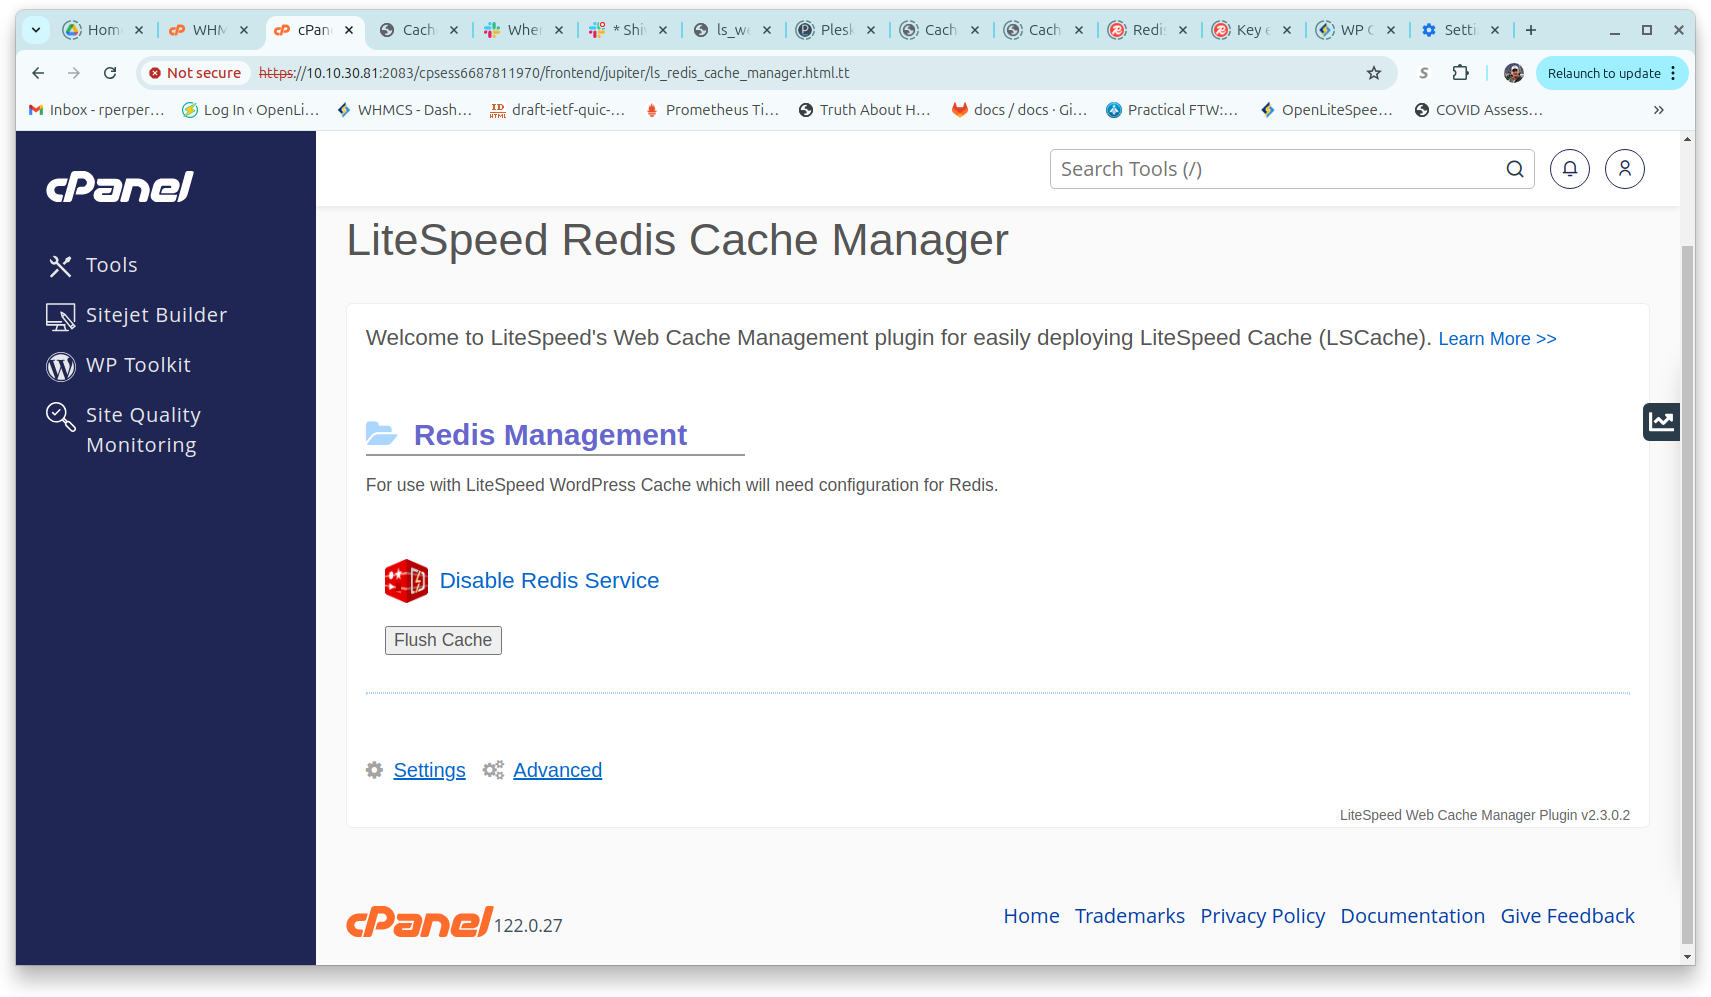
If the service is set up or a default is set, you will have the option to Enable Redis Service, which will create and start the service.
If already enabled, you will have the option to Disable Redis Service, which will stop and disable the service. Note that these options take effect after confirmation.
Warning
You must further configure LiteSpeed WordPress Cache to use Redis if you enable this service.
Flush Cache can be pressed to flush the Redis Cache, typically done after a software or data upgrade to invalidate all cache information and repopulate the cache.
Translations
As of the cPanel user-end plugin v1.2.2, a lang/ directory has been added. This will allow custom translations for plugin text. The translation language used is based on the cPanel dashboard locale selected.
The lang/ directory will also contain any translations submitted to LiteSpeed for inclusion in the plugin package. Be aware that these translations will be bypassed if any custom translations for that locale exist in the lang/cust/ directory.
Instructions for translating the plugin are included in the plugin's lang/cust/ directory README file, included below:
Welcome to the LiteSpeed Web Cache Manager user-end cPanel plugin's 'lang/cust'
directory. This directory will contain any custom translations you would like
to use with the LiteSpeed Web Cache Manager user-end cPanel plugin.

This file will now explain how to provide your own custom translations for this
plugin based on the language selected in a user's cPanel dashboard.

1) Choose a cPanel locale to provide translations for. A full list of available
locales can be found through WHM under

Home >> Locales >> View Available Locales

2) Once a locale has been chosen, create a directory under this plugin's
'lang/cust' directory for that locale using the same name as the locale. Then
create an 'en_US' directory under that, and an 'LC_MESSAGES' directory under the
'en_US' directory.

Using French as an example (cPanel locale 'fr') our directory structure would look
like:

lang/
-cust/
--fr/
---en_US/
----LC_MESSAGES/

Note: The 'en_US' directory exists as a workaround for linux systems that may not
contain certain locales, as it is commonly installed on most systems. If you
are running into issues getting your translations to appear, please make sure
that the 'en_US.utf8' locale is installed on your system.

Note: As long as the 'lang/cust/fr' directory exists, this directory will always be
used when looking for translation files, regardless of wheather or not any
exist. If you would like to go back to checking the official translation
directory under 'lang', you must remove/rename the 'cust' locale directory.

3) Generate a 'messages.po' file for your desired language based on the
'messages.pot' file provided under the 'lang' directory, or copy the 'messages.po' file
for your locale if it has already been officially provided under the 'lang'
directory.

4) Update the generated 'messages.po' file with any new translations. You should
also update the 'messages.po' file header info if you have not already.

5) Generate a 'messages.mo' file based on your updated 'messages.po' file and place
both the 'messages.po' and 'messages.mo' files under the custom 'LC_MESSAGES'
directory created earlier.

6) Visit the LiteSpeed user-end cPanel plugin through a cPanel dashboard and
confirm that your translations are appearing.

CAUTION: Any custom translation files will be lost upon uninstalling the
LiteSpeed Web Cache Manager user-end cPanel plugin. Please keep a copy of any
custom translation files elsewhere to prevent loosing these files.

That should be all that is required to begin using custom translations with the
LiteSpeed user-end cPanel plugin.

If you would like to have your custom translations included as official
translations in future versions of the LiteSpeed Web Cache Manager user-end
cPanel plugin, or have updates for exisitng official translations, please send
an email including the locale and both 'messages.po' and 'messages.mo' files to
info@litespeedtech.com.