reCAPTCHA
As of LiteSpeed Web Server 5.4, reCAPTCHA is available as a method of defense against DDoS attack.
Tip
reCAPTCHA may also be used as a method of WordPress Brute Force Attack Protection. Please see the WP-Protect Guide for more information about that.
Note
reCAPTCHA activation is dependent on the URL being accessed. It does not activate for API urls. reCAPTCHA only activates for URLs accessed by real clients.
Enable Globally at the Server Level
Access the WebAdmin console via https://YOUR_SERVER_IP:7080
Navigate to Configuration > Server > Security > reCAPTCHA Protection
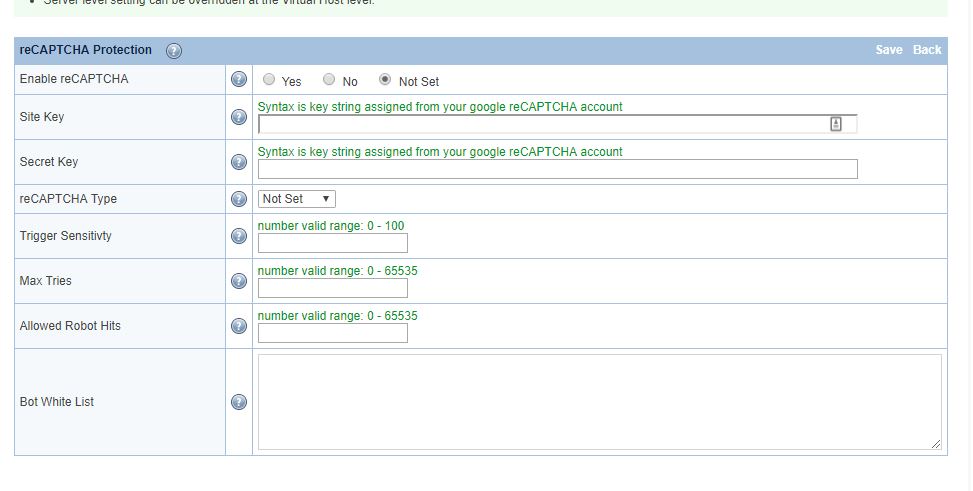
Set Enable reCAPTCHA to Yes. This is the master switch and it is required for both a control panel environment and an LSWS native environment. It will enable the reCAPTCHA feature for all control panel Apache virtual hosts as well as LSWS native virtual hosts globally. It may be overridden at the virtual host level.
For other options, hover over the ? symbol to view detailed information about that option.
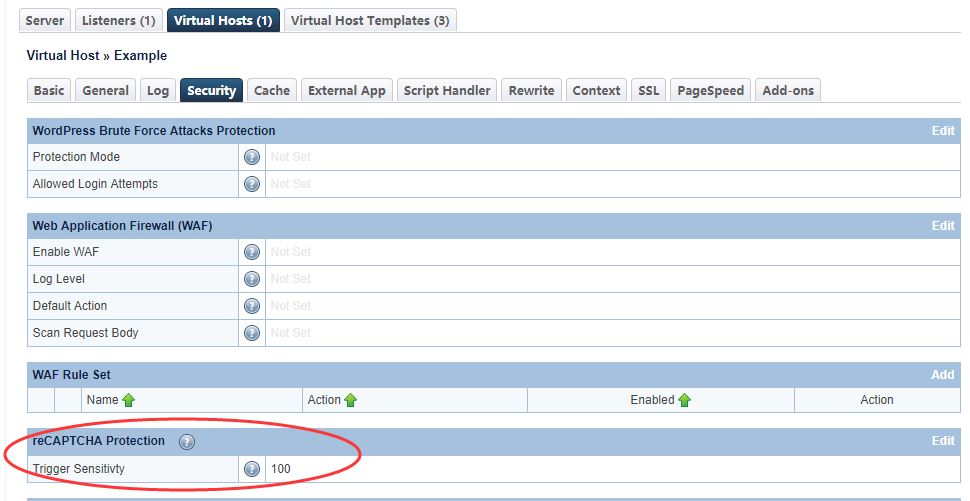
For demonstration purposes, we will set Trigger Sensitivity to maximum (100), and reCAPTCHA Type to Checkbox. You may adjust these values according to your needs. Save and restart LSWS. This sensitivity setting will be inherited by all control panel Apache virtual hosts and LSWS native virtual hosts unless overridden at the virtual host level.
After making the change described above, the appropriate directives will be added to the LiteSpeed configuration file /usr/local/lsws/conf/httpd_config.xml.
Alternatively, you can add them yourself. Edit the file via vi /usr/local/lsws/conf/httpd_config.xml, and place the following code after the <security>...</security> section: <lsrecaptcha> <enabled>1</enabled> <type>1</type> <sensitivity>100</sensitivity> </lsrecaptcha>
You can also enable reCAPTCHA on an individual virtual host that is under attack, while leaving other websites disabled.
Validation expiration time
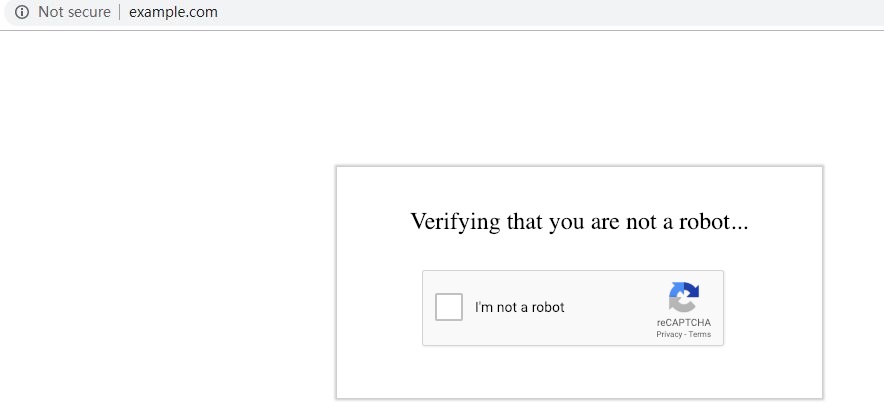
When a visitor accesses the website, they will need to go though reCAPTCHA validation. This validation protects the server against HTTP Flood and other DDoS attacks.
After passing the reCAPTCHA validation, the visitor is temporarily whitelisted as long as they continue to browse the site. This makes for a better user experience. Once the visitor has been inactive for a specified time, reCAPTCHA is once again enabled for that visitor's next request.
Prior to LSWS v5.4.8 build 4, expiration time was 20 minutes. As of v5.4.8 b4, expiration is one day. If one day doesn't work for you, it will be configurable in the upcoming v6 release.
Override/Disable at the Virtual Host Level
Assuming you have enabled reCAPTCHA at the server level globally, you can override the settings at a virtual host level, but how you do so depends on which environment you are using.
Override/Disable for Apache Virtual Hosts
As of LSWS v5.4RC4, you can configure vhost-level reCAPTCHA via the LsRecaptcha directive in the virtual host include configuration, like so:
<IfModule LiteSpeed>
   LsRecaptcha (0-100)
</IfModule>
The 0-100 value defines or overrides Trigger Sensitivity for the virtual host. When LsRecaptcha is set to 0, it means the reCAPTCHA feature has been disabled for that virtual host.
Note
The LsRecaptcha directive cannot be used in .htaccess files.
Set Max Conn to trigger reCAPTCHA
In an Apache configuration file, either at the server level, or at the virtual host level, you can add the LiteSpeed-specific configuration LsRecaptcha max_conn. The parameter value defines the maximum number of concurrent connections you can have before reCAPTCHA is automatically triggered.
Example
To set the maximum number of concurrent requests to 1000, use:
<IfModule LiteSpeed>
LsRecaptcha max_conn 1000
</IfModule>
Set the parameter value to 1 if you want to always have reCAPTCHA on. Set the value to 0 to disable reCAPTCHA.
LsRecaptcha max_conn used at the server level applies to all Apache virtual hosts, but the server-level setting may be overridden with a vhost-level configuration.
Override for LiteSpeed Native Virtual Hosts
Use the LSWS WebAdmin console to override reCAPTCHA in LSWS native mode.
Navigate to Configuration > Virtual Hosts > Security > reCAPTCHA Protection
Set Trigger Sensitivity
Trigger Sensitivity refers to the automatic reCAPTCHA sensitivity. The higher the value, the more likely reCAPTCHA Protection will be used. A value of 0 is equivalent to “Off” while a value of 100 is equivalent to “Always On”.
Default Values
Server level: 0. Virtual Host level: inherits server-level setting. Syntax: Integer value between 0 and 100.
LiteSpeed calculates Trigger Sensitivity as the percentage of your server capacity used, based on the number of active connections. reCAPTCHA is activated when this formula is true:
Active connections * 100 / Max Connections > (100 - Trigger Sensitivity)
For example:
If Max Connections = 1000, Trigger Sensitivity = 20, and you currently have 900 connections, the formula would be evaluated like so:
900 * 100 / 1000 > 100 - 20
90 > 80
The result is true, so the incoming connection will be given a reCAPTCHA test.
Calculating backwards, you can see that when the number of connections drops to less than 800, reCAPTCHA will not be invoked.
Warning
We've discovered in real world usage that Trigger Sensitivity can be ineffective in some setups.
Here's why: Trigger Sensitivity is based on the number of active connections. But sometimes, sites have a large number of connections that are unrelated to the main page HTML. These extra connections don't result in anything that is visible to the user, but they require a high connection limit. The high connection limit negatively impacts the Trigger Sensitivity calculation, making most values under 100 behave effectively like 0.
In our experience, the headaches caused by trying to use Trigger Sensitivity under these conditions are not worth the benefits. If you have high connection limits set, we recommend two possible courses of action:
- Go all or nothing: set the sensitivity to
100(always on) or0(always off) - Use rewrite rules: Set sensitivity to
0at the virtual host level, and then selectively enable reCAPTCHA for certain URLs via rewrite rules, like the following example, which applies to all URLs in the/admin/directory.
This is how it would appear if added to the Apache virtual host configuration:
<IfModule LiteSpeed>
RewriteRule /admin/ - [E=verifycaptcha:deny]
</IfModule>
The same rule would need to look a bit different (no beginning / on admin/) if added to .htaccess, like this:
<IfModule LiteSpeed>
RewriteRule admin/ - [E=verifycaptcha:deny]
</IfModule>
Advanced Configuration
Advanced Configuration: Define reCAPTCHA Actions through Rewrite Rules.
If you want to further define the reCAPTCHA action as deny or drop, you can use one of the following rewrite rule directives:
[E=verifycaptcha][E=verifycaptcha:deny][E=verifycaptcha:drop]
[E=verifycaptcha] will always redirect to reCAPTCHA until verified. ACTION can be deny to return a 403 or drop to drop the connection when Max Tries is reached. Until Max Tries is reached, the client will be redirected to reCAPTCHA.
Example
RewriteCond SOME-CONDITIONAL-CHECK
RewriteRule .* - [E=verifycaptcha]
(SOME-CONDITIONAL-CHECK would be a suspicious UA, IP address, etc.)
Note
In most cases, rewrite rules will override the default server behavior. However, in cases where trigger sensitivity is high, visitors may be sent directly to reCAPTCHA before the rewrite rules can even be processed.
Enable reCAPTCHA Protection for any URL
You can enable reCAPTCHA for a specific URL. For example, you might want to protect the admin area (/administrator/) for all Joomla sites on the server.
Example
In cPanel, create /etc/apache2/conf.d/userdata/joomlaprotection.conf with the following content:
<IfModule LiteSpeed>
RewriteRule /administrator/ - [E=verifycaptcha:deny]
</IfModule>
Apply to all cPanel virtual hosts and restart LiteSpeed:
/usr/local/cpanel/scripts/rebuildhttpdconf
service lsws restart
Customize the Good Bots List
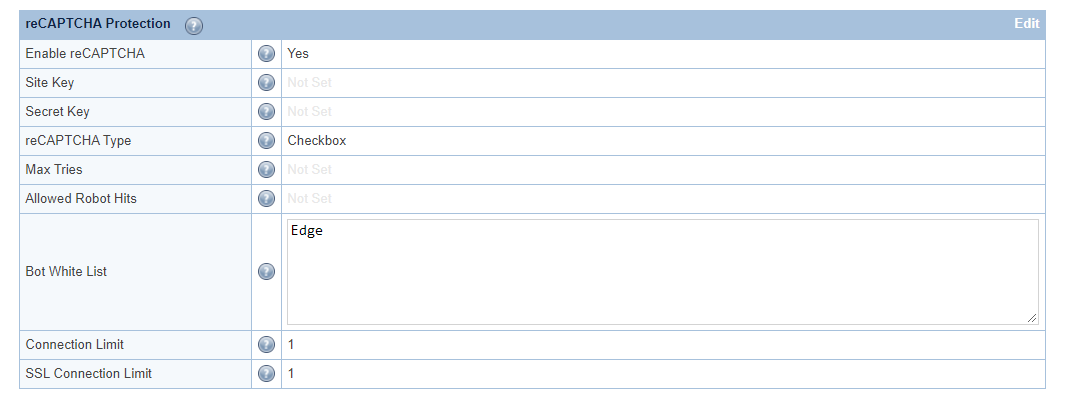
Google bots are considered good bots because they help index your site. However, they cannot do their job properly without receiving the correct page. The Bot White List configuration may be used to specify bots that you may need for your site.
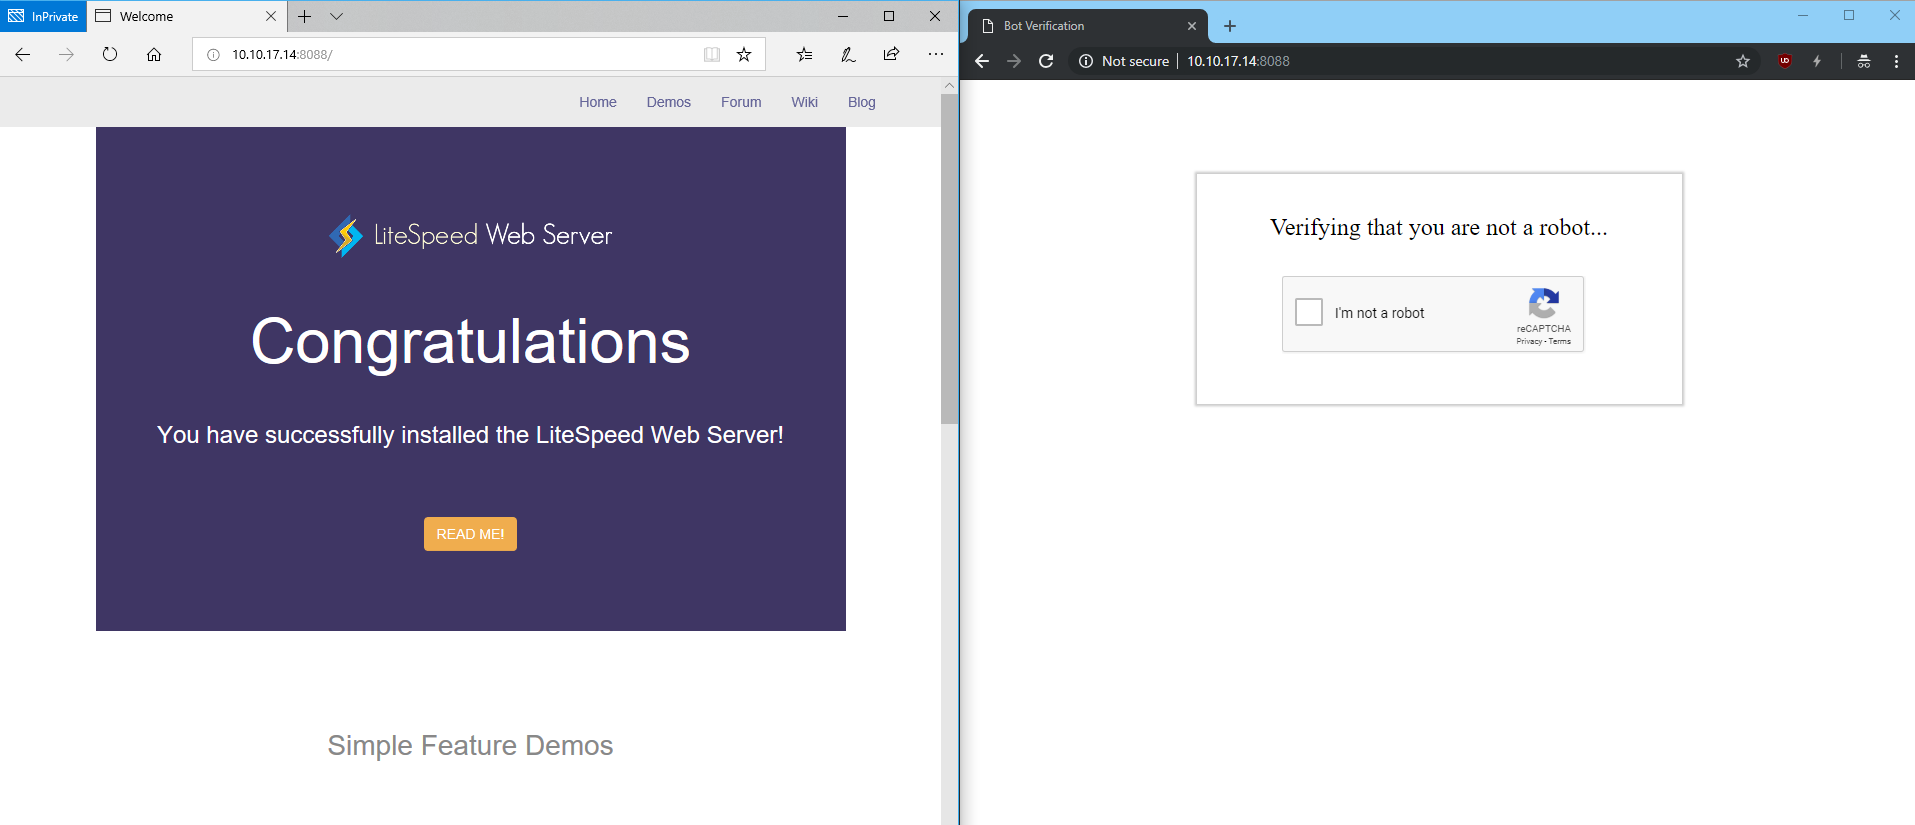
Here, we have configured Edge in the Bot White List text area. Bot White List is a case-sensitive "contains" match, but regex may be used as well.
After restarting, browsers containing Edge in the user-agent header will bypass reCAPTCHA:
The Allowed Robot Hits configuration may be used to limit how many times a good bot (including Googlebot) is allowed to hit a URL before it is redirected to reCAPTCHA as well. This may be useful to prevent bad actors from bypassing reCAPTCHA using a custom user agent.
Tip
Google and Bing bots are automatically whitelisted. You will need to add any other bots you wish to allow.
Customize the reCAPTCHA Page
The default reCAPTCHA page is generic. If you would like to customize the page, you may do so by creating a file at $SERVER_ROOT/lsrecaptcha/_recaptcha_custom.shtml.
There are two script tags that are required and it is strongly recommended to avoid changing the form and the recaptchadiv unless you know what you are doing. There are three echos within the page itself. Those are used by the web server to customize the reCAPTCHA type and keys and specify any query string used.
Beyond those required attributes, everything else is customizable. As noted before, please ensure that you have backups of the default page and your customized page. Note that the .shtml extension is required in order to use the LSWS configured type and keys.
Add Headers to the reCAPTCHA Page
You can customize the headers on the reCAPTCHA page. To do so, add a static context with the url /.lsrecap/, then add the desired response header for that context.
<IfModule LiteSpeed>
    <Location "/.lsrecap/">
        Header set Access-Control-Allow-Origin "*"
    </Location>
</IfModule>
This snippet cannot be added to .htaccess. It must either be added to an Apache config file, or via the WebAdmin Console for an LSWS Native virtual host.
Example
To add a CORS header to the reCAPTCHA page in a WHM/cPanel environment:
- Add a
<Location "/.lsrecap/">context to a global include file at/etc/apache2/conf.d/userdata/lsrecaptcha.confto apply the customization to all virtual hosts - Add a
<Location "/.lsrecap/">context to a virtual host include at/etc/apache2/conf.d/userdata/ssl/2_4/$USER/yourdomain.com/lsrecapcha.confto apply the customization only to$USERvirtual host
Apply Your Own Site Key
You can apply your own reCAPTCHA key and adjust the configuration as you like from the Google developer reCAPTCHA page.
Tip
When applying for your own key, sign up for reCAPTCHA v2, not v3
The stle of client verification is completely determined on Google's end via their reCAPTCHA service. When given the choice of a checkbox or an invisible badge, you may choose whichever you like. Be aware that the invisible type may sometimes display a difficult puzzle.
For server wide protection that needs to cover a lot of domains, un-check Verify the origin of reCAPTCHA solutions. Otherwise, you may need to apply a separate key for each domain. Please refer to the Google doc for more information.
reCAPTCHA in ModSecurity Rules
You can trigger reCAPTCHA through the ModSecurity engine via an environment variable, by adding a rule like this one:
SecRule REQUEST_URI "@contains /test.php" "id:9812419,phase:2,setenv:verifycaptcha=1"
The example above triggers for any URI that contains /test.php.
The value of verifycaptcha should be set to one of the following:
deny, which returns a 403 errordrop, which drops the connection
Troubleshooting
reCAPTCHA Returns 403 and Drops Connection
If reCAPTCHA fails a few times, it will return a 403 error and then drop the connection from that IP. It works this way in order to block attacks. If the invisible reCAPTCHA keeps auto-refreshing and then fails, just change the type to one-click.
